| teal_dx |
| (Post Master) |
| 04/06/06 03:48 PM |

|
|
|
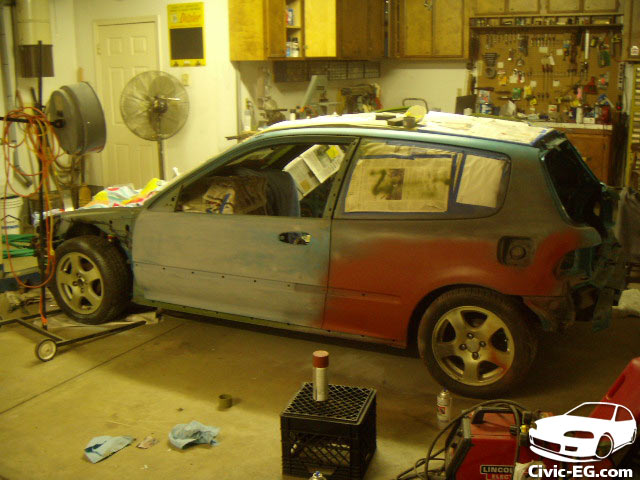
What I've been doing all winter:
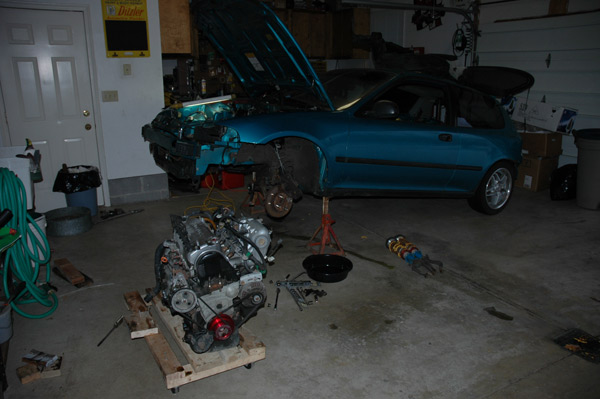
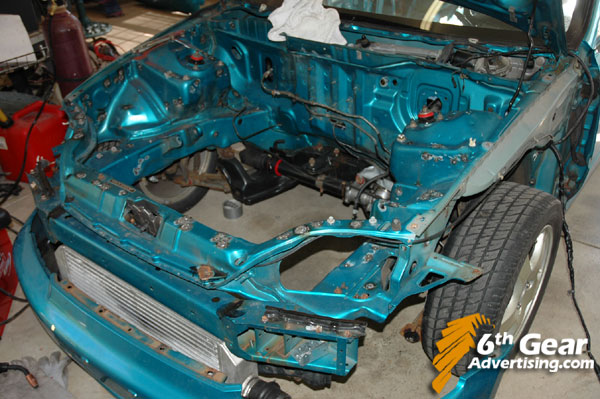
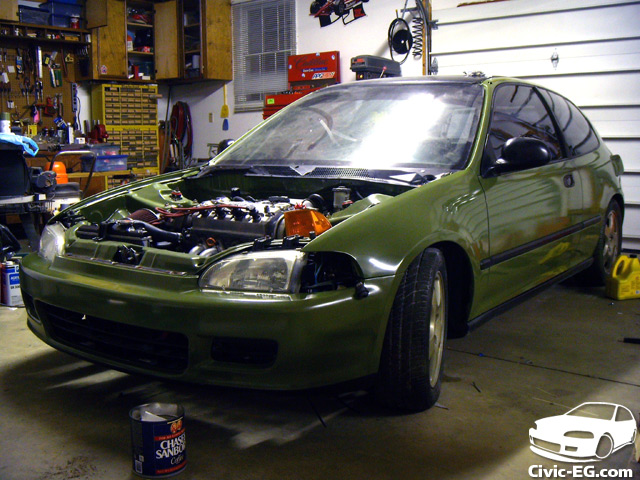
I have had my hatch since 2000 and bought it is a DD/winter car so I wouldn't have to drive the Mustang. Well I couldn't just leave it alone, I started with suspension, then intake/header/exhaust, and then a Y8 mini-me swap. Last summer I bought the HX for cheap so that has become my new winter car. I pulled the hatch in the garage thanksgiving last yr and have been working on it on weekends, here's some pics of the progress.
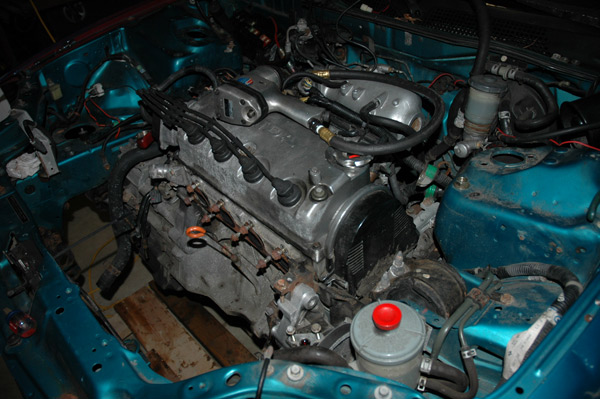
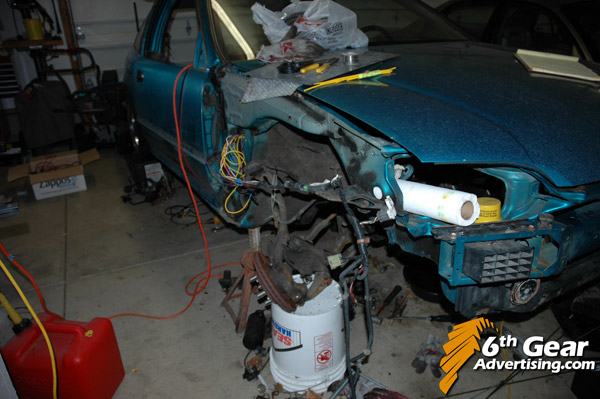
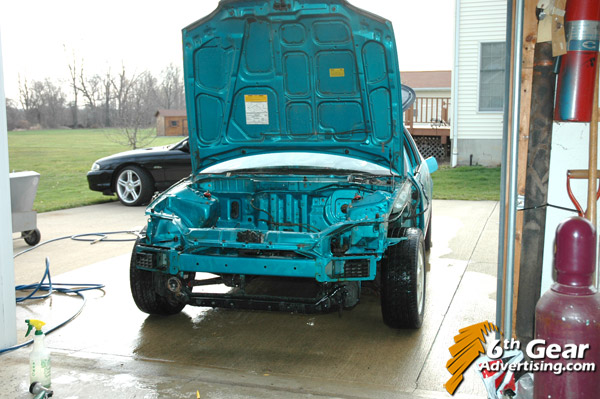
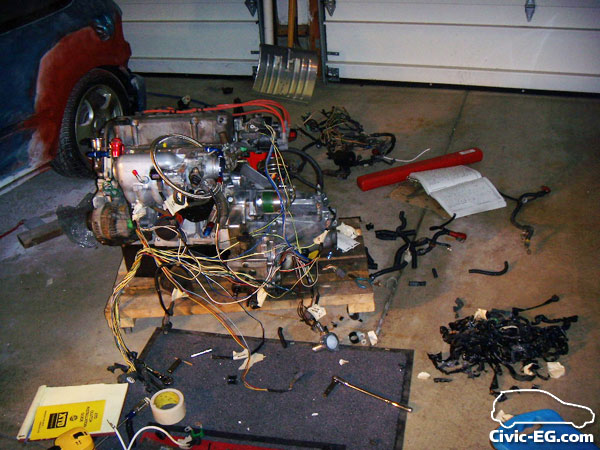
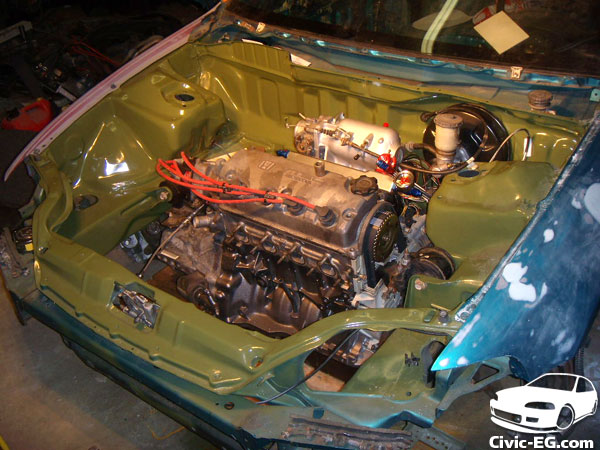
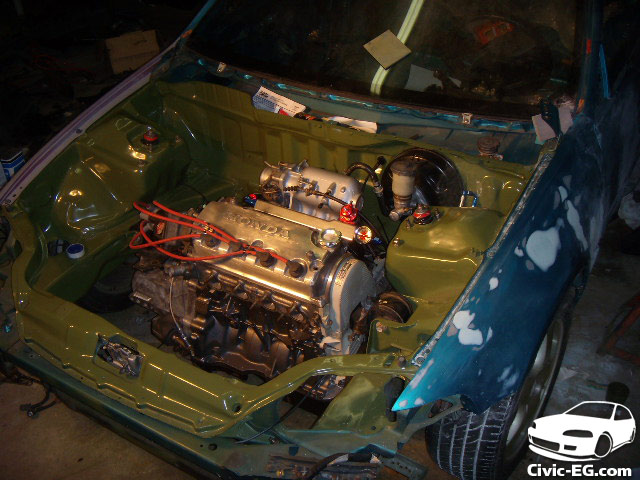
Old motor
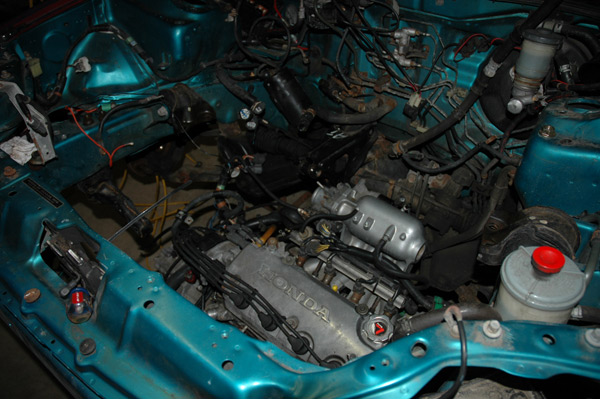
bunch of useless clutter left in the bay
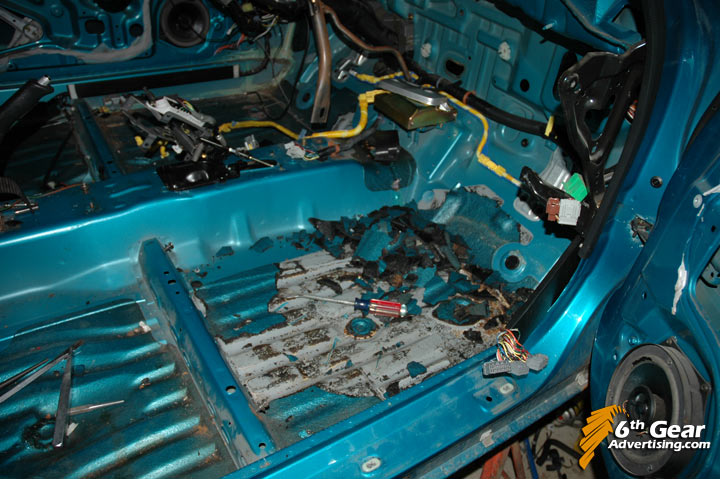
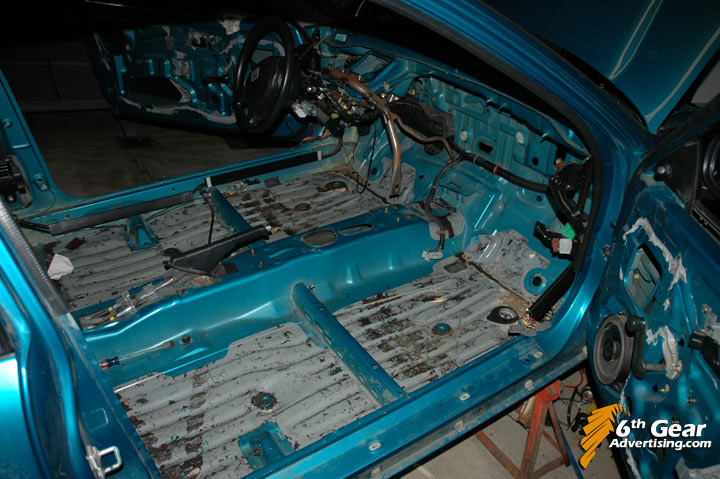
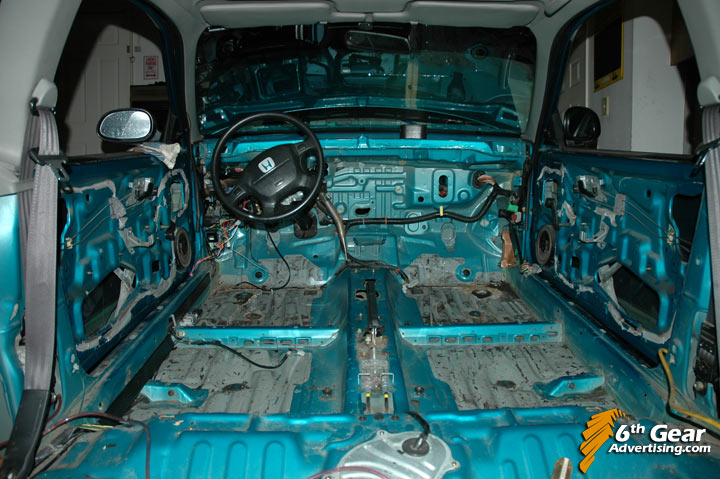
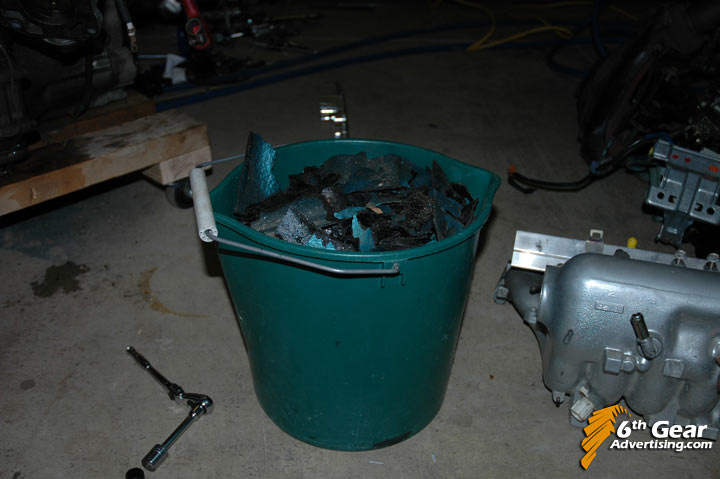
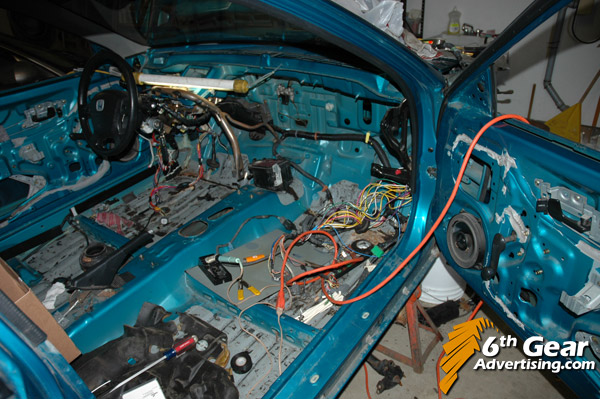
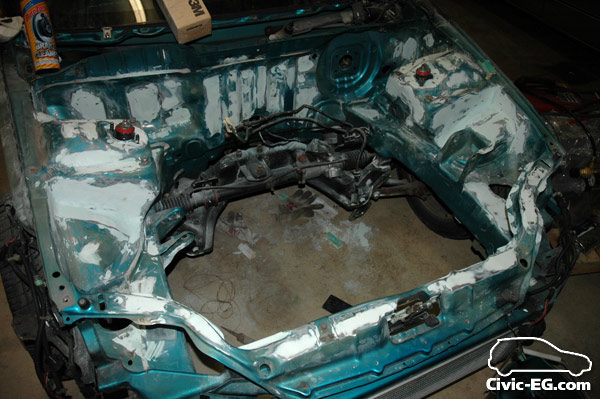
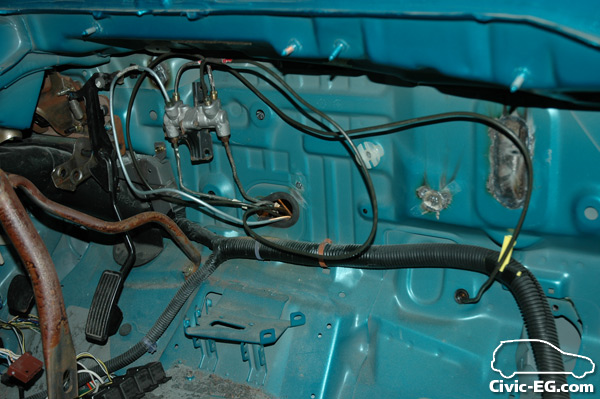
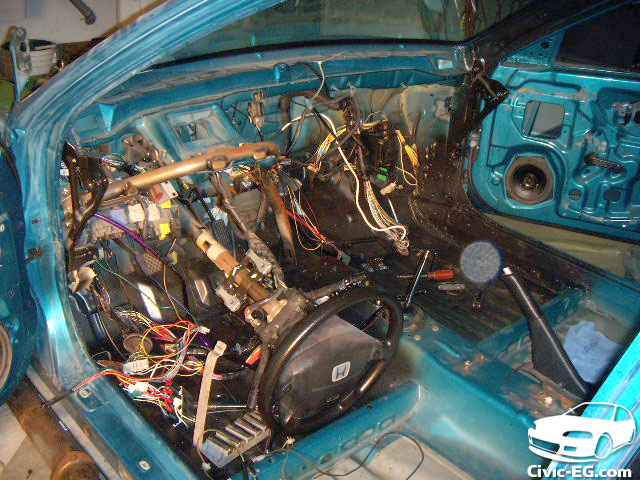
here's a pic, had the interior out to convert to manual and for re-routing some of the wiring harness. it was about 0° one night, a good time to remove the sound deadening

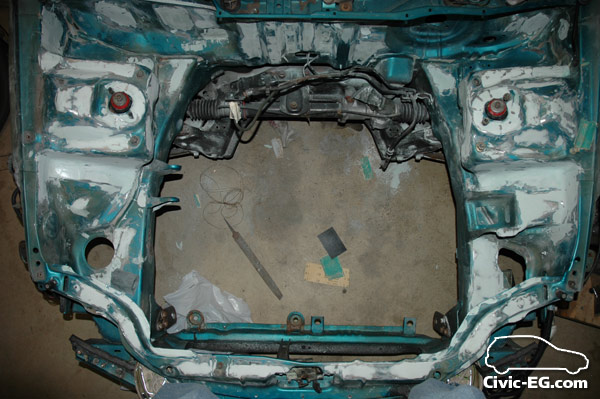
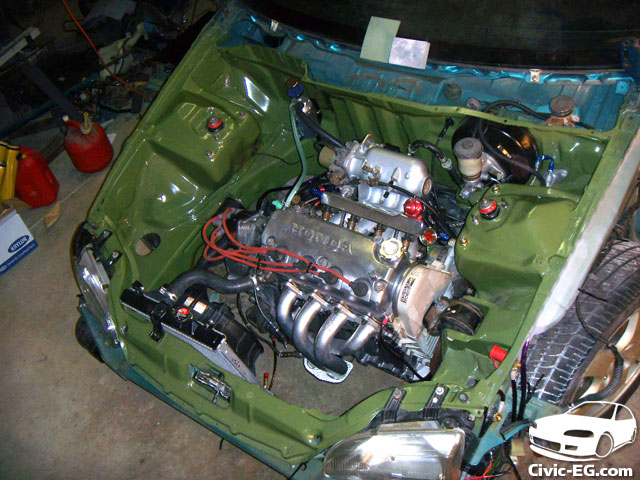
a little while later:
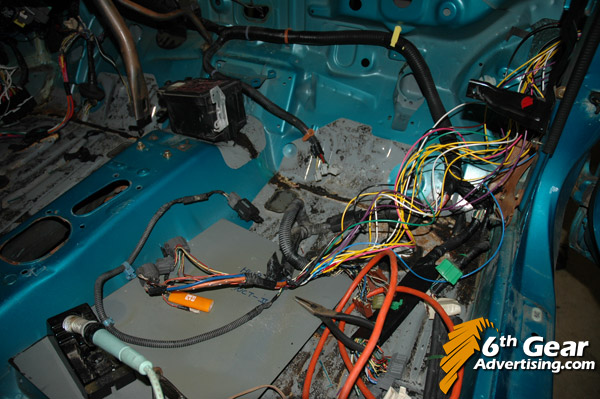
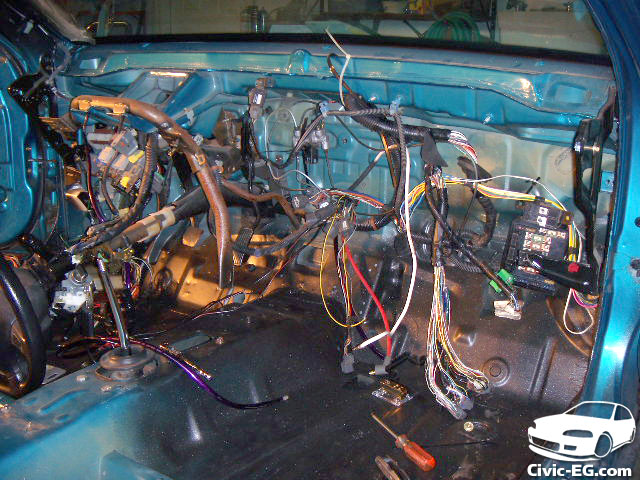
And then the wiring:

stock
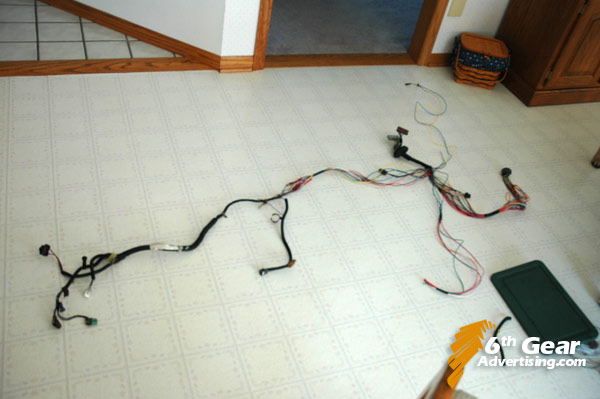
lengthened
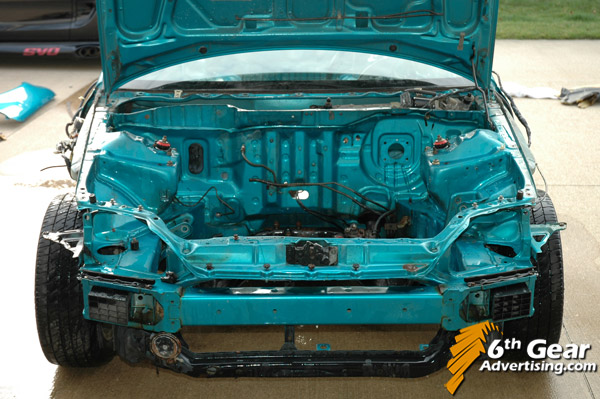
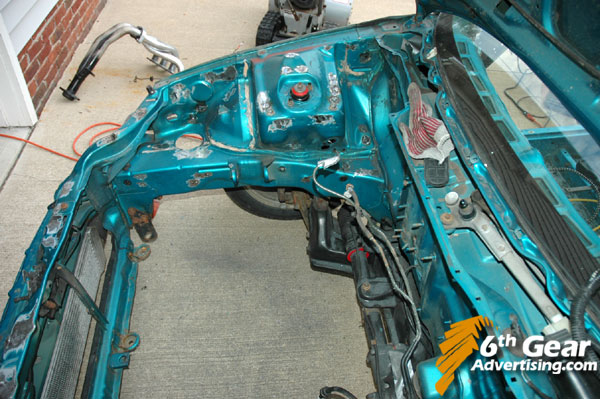
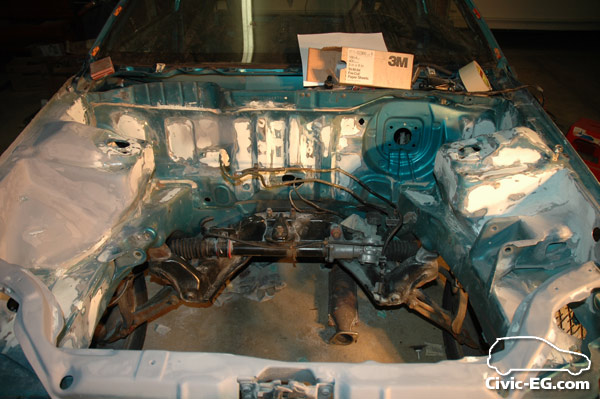
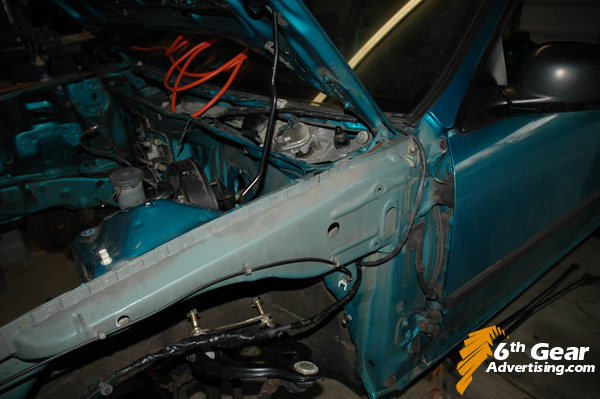 the goal is to re-run the wires for a cleaner engine bay. here the driver side comes out of an existing plugged hole connecting the cabin & inner fenderwell.
The passenger side harness was going to be a pain to remove, so I left it in the car & extended it.
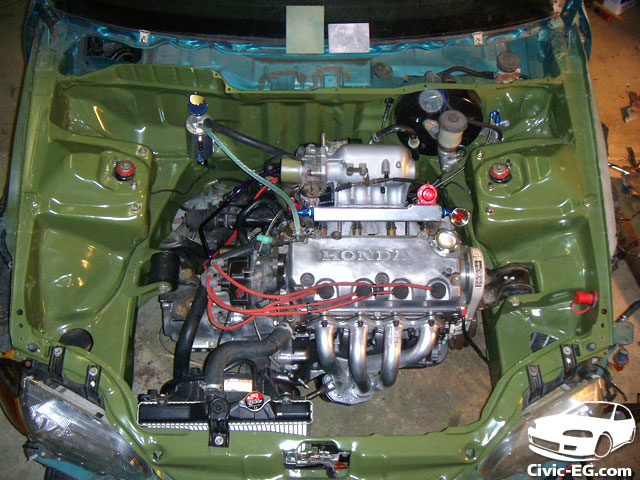
There's also a plugged hole on the right side that connects the cabin to the inner fender area. These wires for the lights/horn/fan will now be hidden.
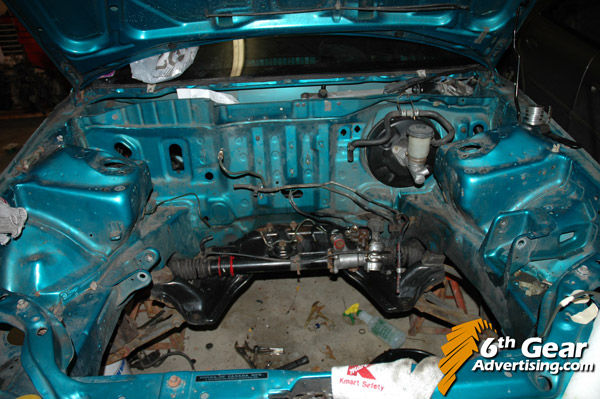
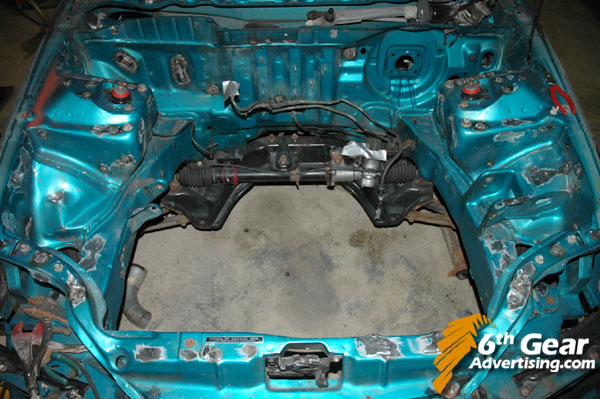
Car came w/ power steering, but I'm converting to manual. Power racks have a quicker ratio than manual, so converting to manual rather than swapping in a manual rack = teh win
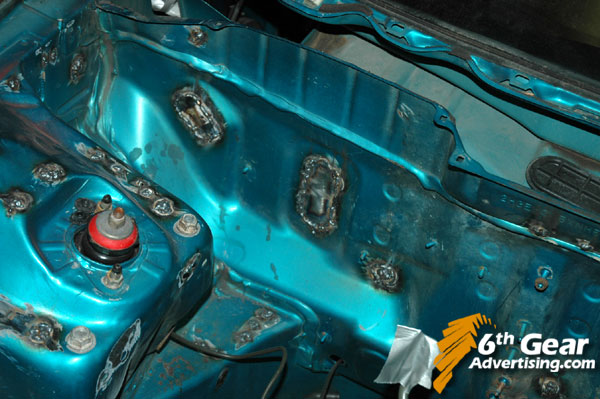
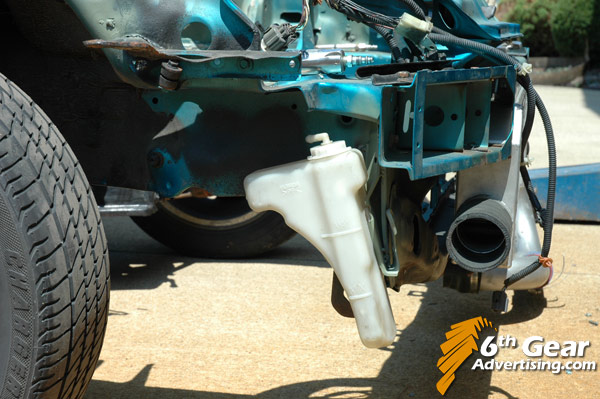
Fuel:
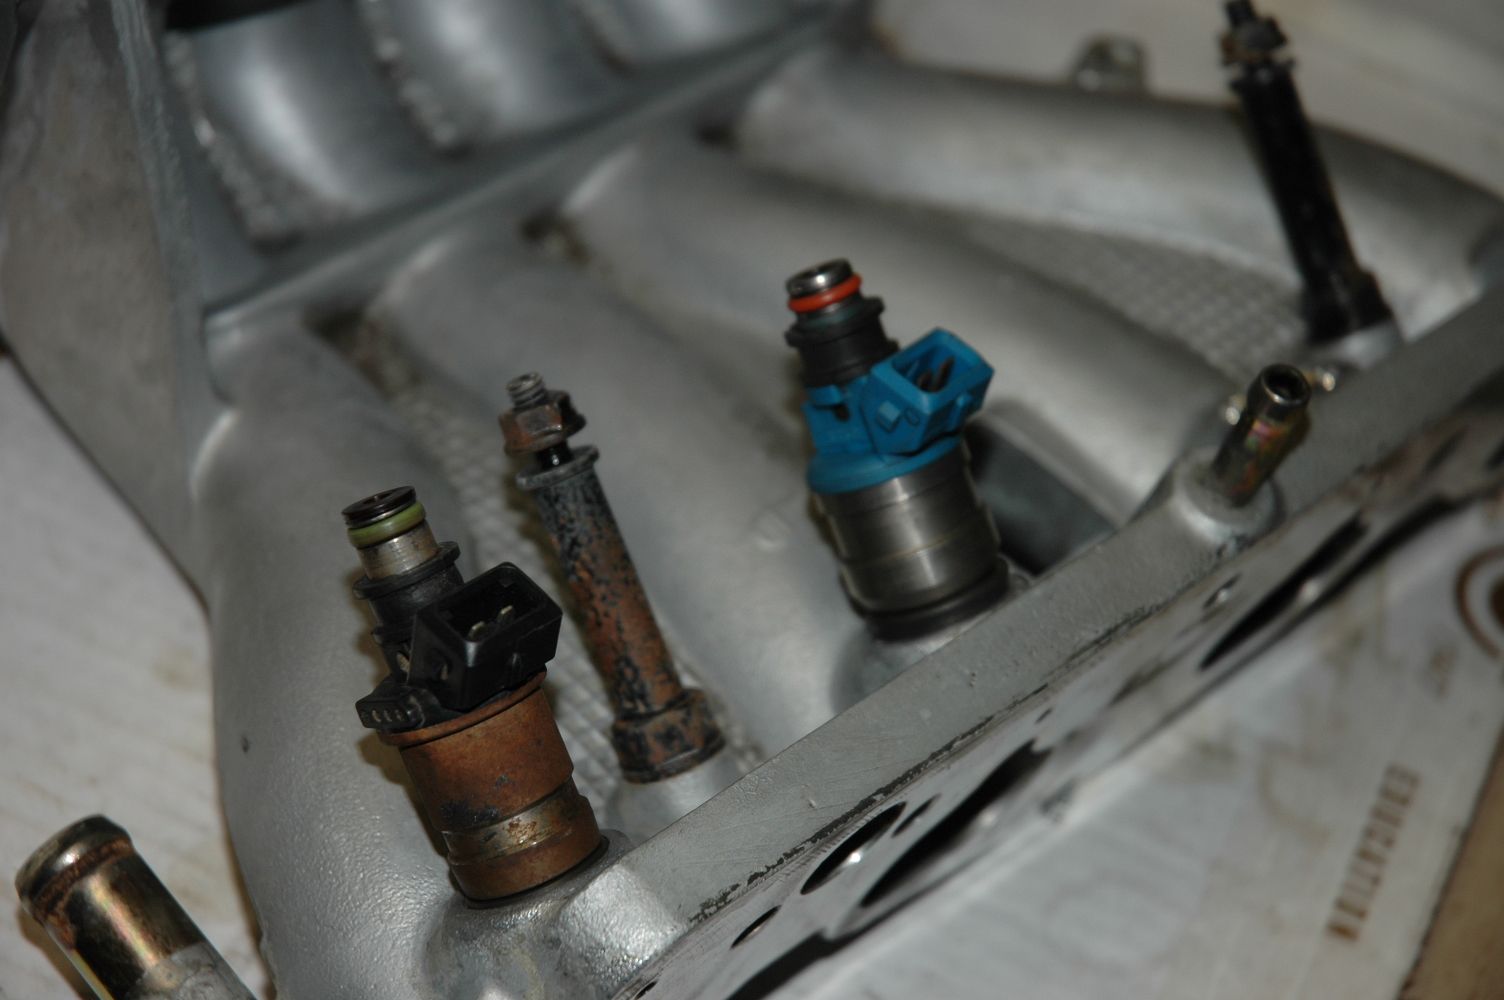
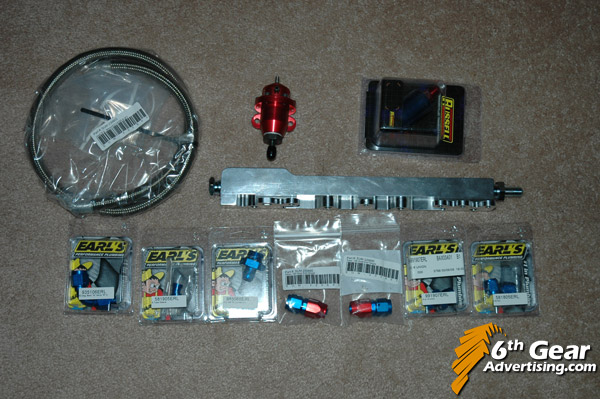
Using an inline fuel filter along with the Earl's fittings to eliminate the ugly oem fuel filter that sits at the top of the firewall.
And what is all this extra fuel for?
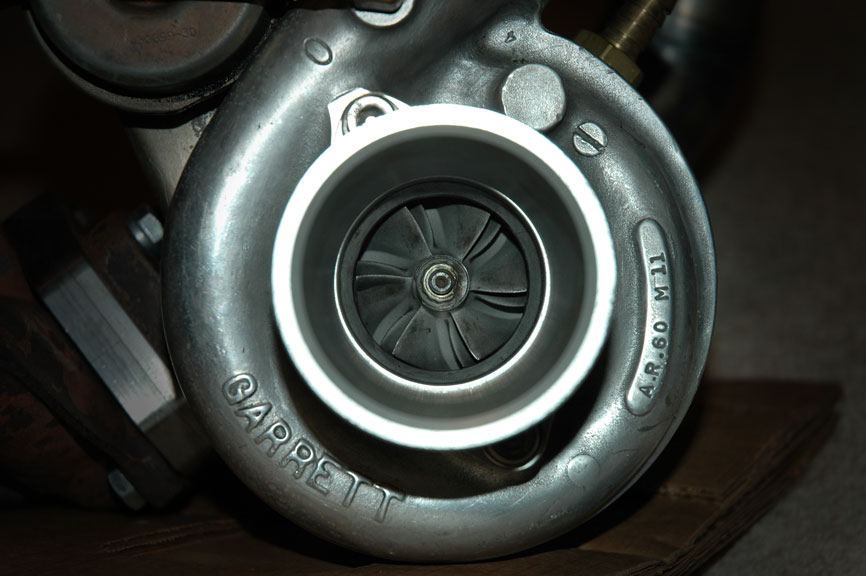

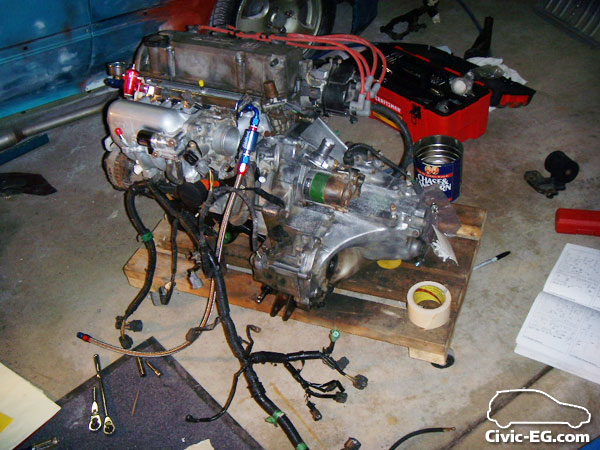
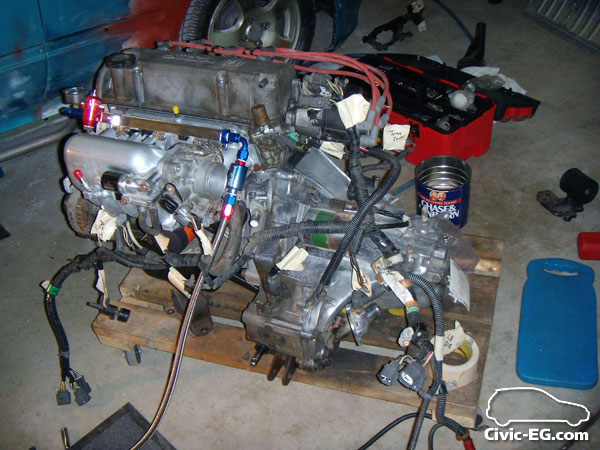
The original plan for winter was just to convert to manual & fix the rust, keeping the Y8 mini-me setup. Bryce gave me his old D16z6 (THANKS again!!) which supplied the tranny. I had the block (which knocked) sitting in the corner of the garage in hopes of tearing it down this summer for a re-build to handle some boost. Well after finding a hell of a deal on the Turbo, I couldn't wait... so that plan is in progress right now.
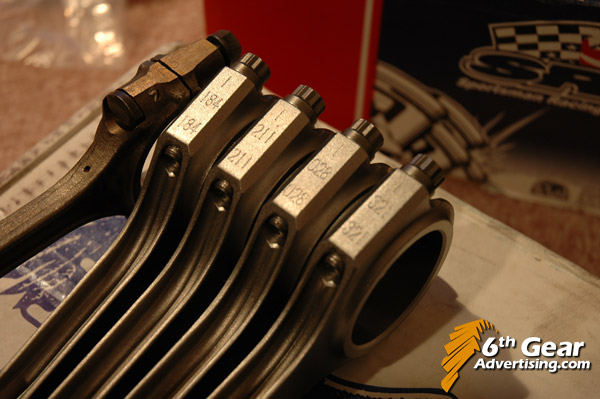

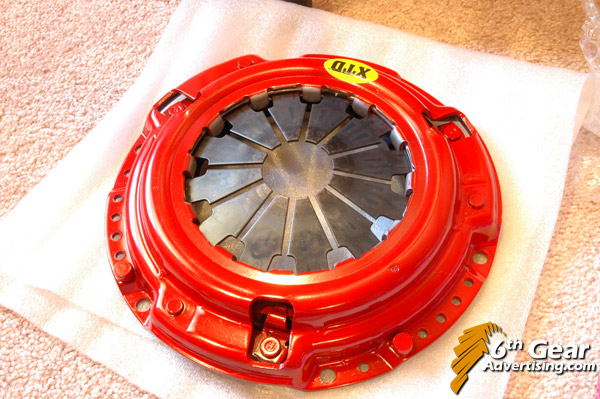
To better handle the boost
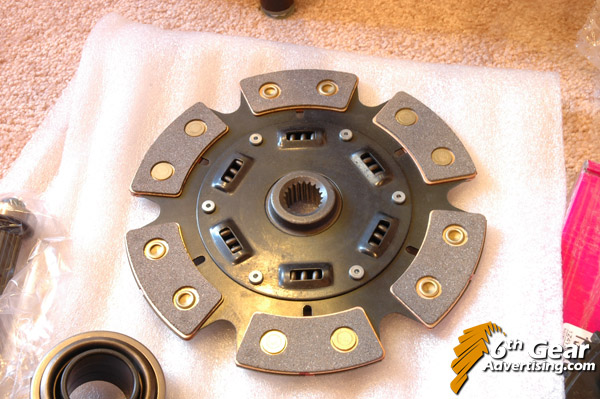
oem clutch won't like that so well so:
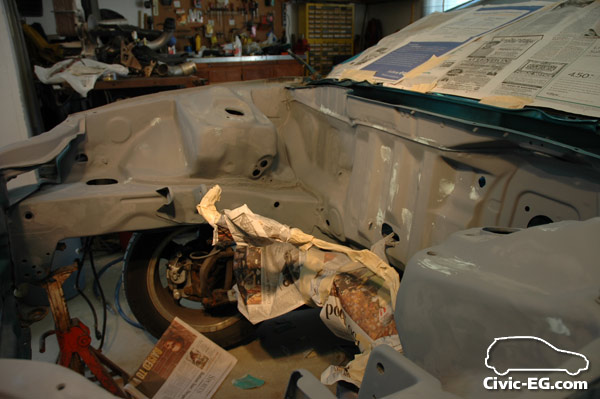
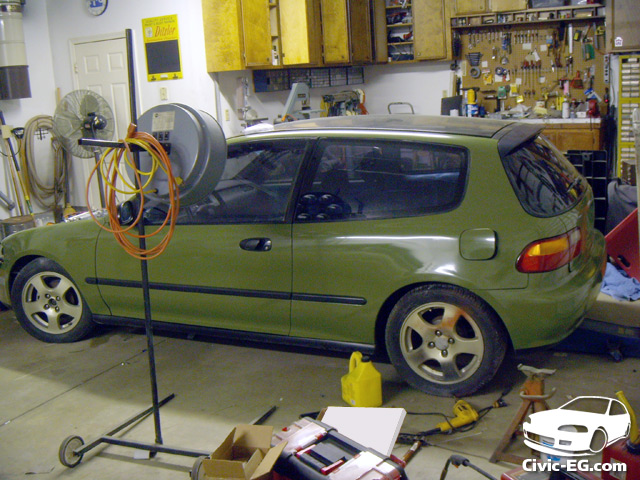
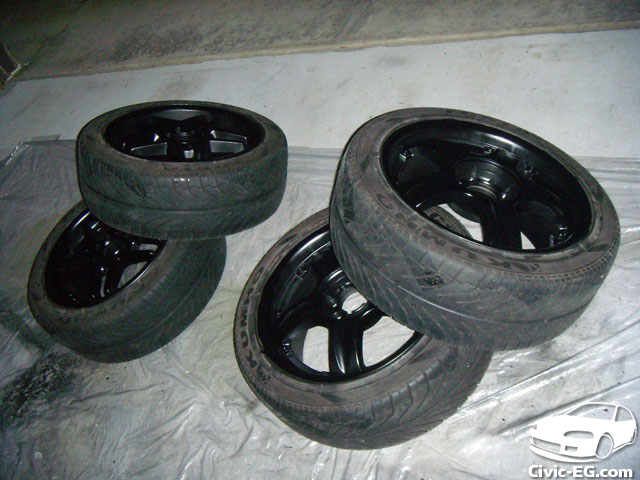
keeping the weight down, the HVAC, heater core, and blower motor are gone, Power Steering lines, pump, resivior is gone, washer resivior is gone, rear wiper is gone (I kept the windshield wipers & motor cause I'm a wuss) Charcoal canister is gone, SRS is gone, rear seatbelts are gone, Probably going to put the carpet, panels, and rear seats back in the car to be in a lower class for auto-x... also those rims from the HX

They are light as hell but looked like ass from 10 years of road salt

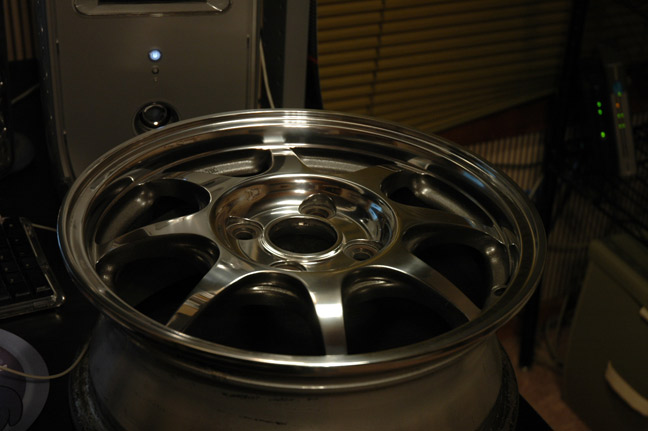
So I did some polishing this winter!
calipers were looking crappy, so while I had them off to install Stainless lines I re-finished those too
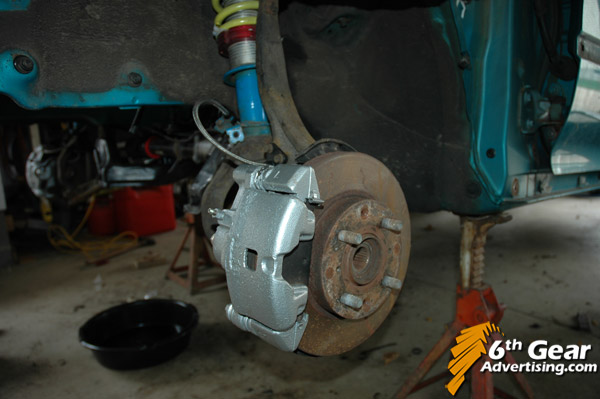
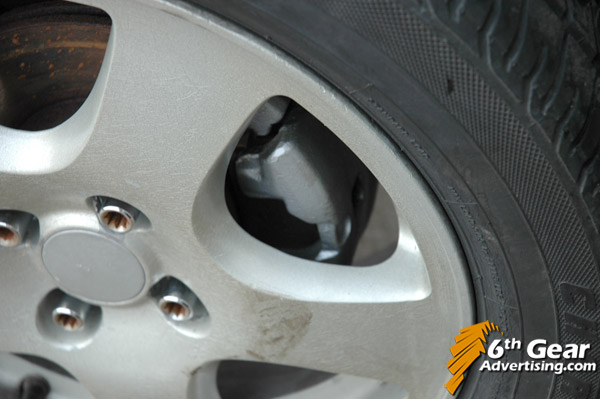
can't see much of them thru the beater rims
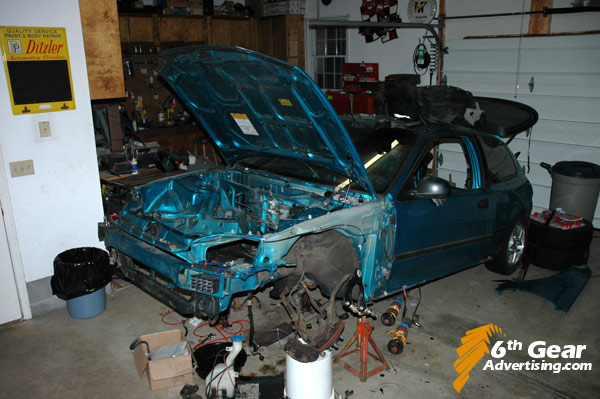
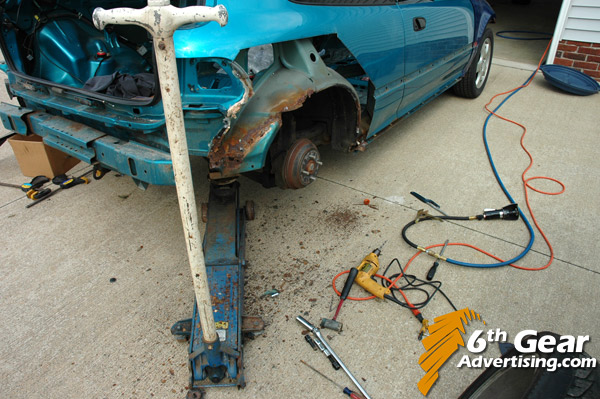
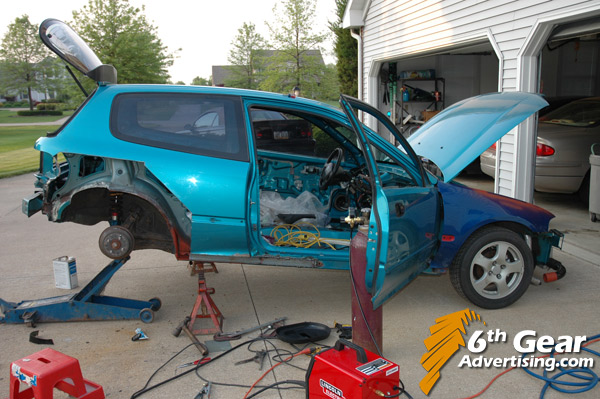
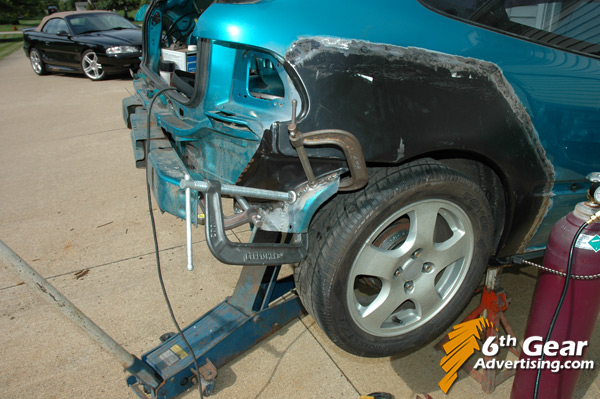
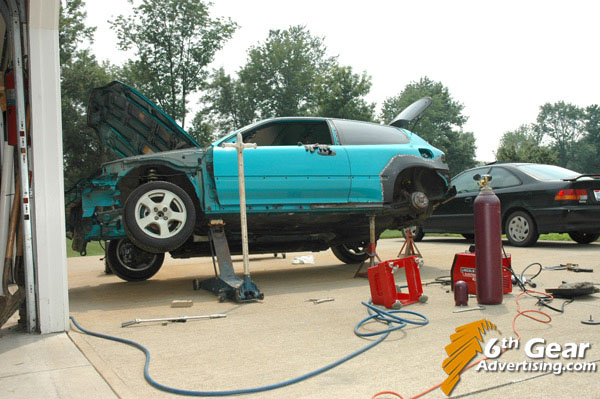
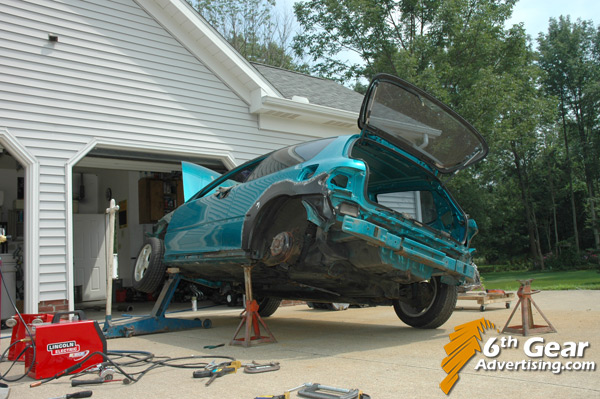
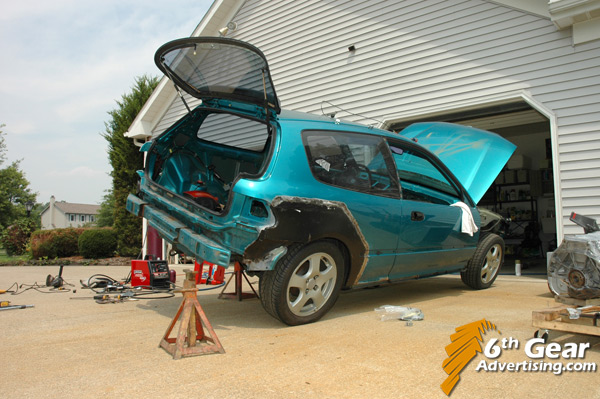
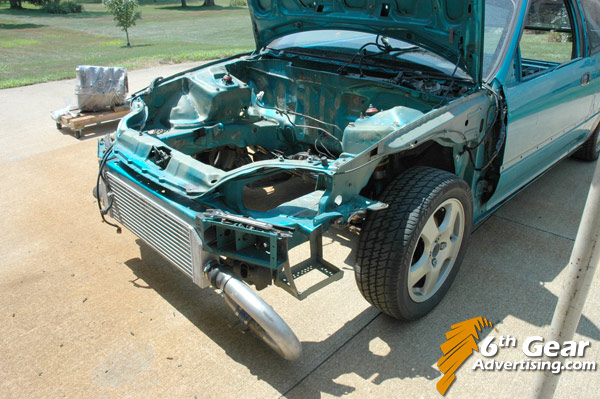
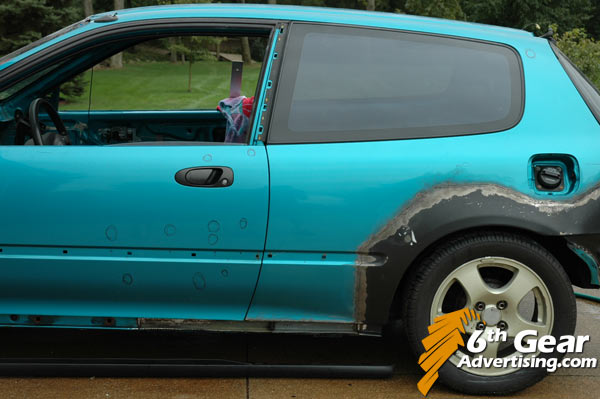
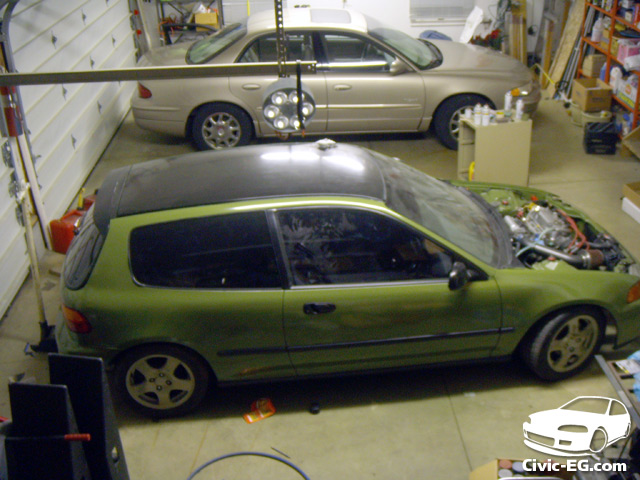
Last weekend was the first time the car moved since Nov,

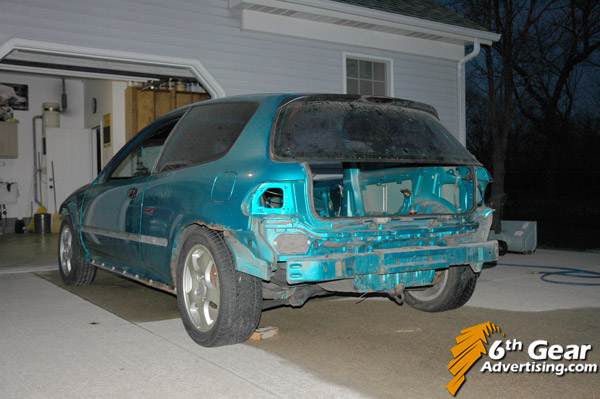
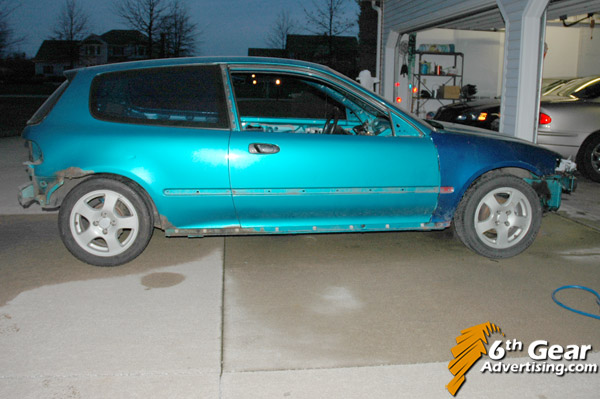
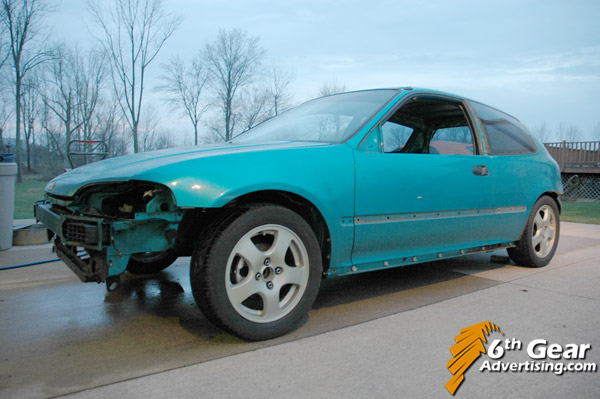

I'm sure the neighbors love a teal shell sitting in the driveway

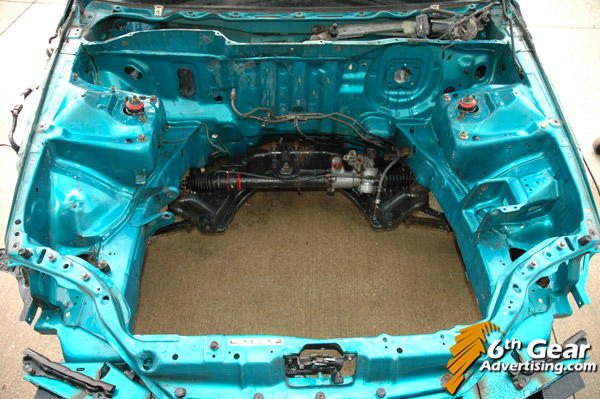
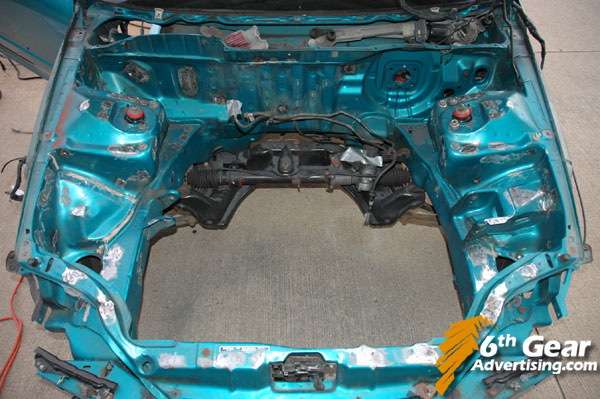
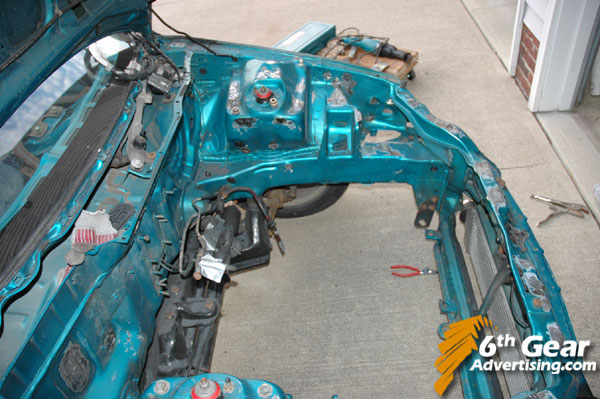
The only additions to this bay will be a motor/tranny, radiator, brake booster/cyl, clutch cyl, and lines and external coil.
No more battery, wires, PS, washer resivior, fuse box, coolant overflow, charcoal canister, fuel filter, brake proportioning valve. all that stuff is either in a cardboard box or relocated somewhere on the car.
After 500 mi with this setup, I'm gonna install the turbo and all the clutter that comes along with it (catch can, vac lines, oil lines, IC, piping)
I'll post the finished car, hoping to have it on the road in a month, after body work & paint job.

The reason I did all this? the 96-98 gt 4.6 isnt the best base for a performance motor b/c of the restrictive heads. Supercharge would cost $3500 and decrease my 1/4 mi by about a second. So why not put that money into a car which has potential to run the same 1/4 mi AND kick ass in the twisties, while getting 30-40 mpg when not being beaten on. And have 2 nice cars, instead of a nice V8 and a deteriorating hatch.

So I'll finally be able to bring my Civic to a CSi meet instead of my Ford
| Mad Hungarian? |
| (Post Master Supreme) |
| 04/06/06 04:04 PM |

|
|
|
wow seriously awesome work, and keep us updated on your project. I remember the first day of seeing the teal beast

| SiWheelman |
| (Post Master) |
| 04/06/06 04:06 PM |

|
|
|
lookin good.
You weren't kidding when you said you had been busy w/ it.
| icybishop |
| (Post Master Sr) |
| 04/06/06 04:11 PM |

|
|
|
wow... fuckin awesome!!!
| gremis |
| (Post Master Supreme) |
| 04/06/06 04:14 PM |

|
|
|
Keep it up!
| HotHB |
| (Post Master Supreme) |
| 04/06/06 04:23 PM |
|
|
Dude! Those HX wheels look pimpin!
By far the best wheel Honda ever made God those pics bring back memories, love the color
| underESTIMATED |
| (Post Master Sr) |
| 04/06/06 05:28 PM |

|
|
|
This is the best thread you've created about the progress of your car.
I can't wait til you actually finish it, so you'll be more social!!
| 12th Monkey |
| (Post Master Sr) |
| 04/06/06 07:56 PM |

|
|
|
i think i've said it before, but man...you give me a hard on.
| tgbastau |
| (Member) |
| 04/06/06 08:31 PM |

|
|
|
Bad ass Brian! I'm jealous.
I'm hoping my hatch restoration will go as well this summer.
Keep us posted!!

Bo Mook
|
| (Post Master Supreme) |
| 04/07/06 09:52 AM |
|
|
looks good, keep it up and keep updating.
| SiAdam |
| (Post Master Supreme) |
| 04/07/06 10:43 AM |

|
|
|
Awesome buddy.
Keep up the good work...
Are you going to keep the same color, or have it sprayed?
Got Boost is there if ya need it...
| todzilla |
| (Post Master Sr) |
| 04/07/06 10:49 AM |

|
|
|
Im so jealous. I wish I had that much knowledge of cars to tear em down and install.
Keep it up and keep us posted.
|
TenTwelve
|
| (Post Master Supreme) |
| 04/07/06 10:53 AM |

|
|
|
| teal_dx |
| (Post Master) |
| 04/07/06 11:26 AM |
|
|
|
|
Been reading up alot on turbo setups, there was a lot to learn and I still don't know it all. Been learning some from the Boost forum, and a few other sites too. I'm sure when I go to install I'll be like WTF is this thing for?
I would have never tried a project like this on a newer vehicle, but this car was pretty simple to take apart. Just take it one step at a time and there's really not a whole lot to a car, interior, electrical system, motor & acessories, emissions, suspension... the hardest part is remembering how everything goes back together. After taking everything off the car over the past 5 yrs except for the gas tank, doors, and steering... I can usually look at a part and know where it goes. I do have a small pile of nuts & bolts though that I have no idea where they are from lol.
As for the paint, I debated for a while on the color. Was thinking about a shade of white, then thought about a medium warm silver with a green tint to it. Metallic Earthtones are popular right now. But I'm leaning toward keeping it Tahitian Green Pearl (teal) so I won't have to mess with the doorjambs and if I do decide to leave the interior out, everything will match. Plus I dont want to paint it an aftermarket color because it is the latest trend, and then have it be played out in a couple of years because everybody else does it. Like back in the day Yellow was the shit, then that metallic orange... Keeping it OEM won't date the car, like if people saw the medium warm silver with a green tint, they would say "oh yeah that was hot in 05-06. So I'm gonna re-paint it teal.
Bryce, let me know when you start on your hatch, I'll probably be able to let you know what not to do, definitely label everything or you'll end up with a pile of WTF bolts like me
next few weeks are gonna be bodywork & fabrication. gotta weld in the new rear panels, figure out a way to fab something up to replace the rear area where the side skirts mount to, shave the engine bay, and make a battery tray that will sit inside the front bumper. I never did any of this before, or painted a car before, but its something to learn on!
I'll keep this updated
| turbo sol |
| (Member) |
| 04/08/06 08:13 AM |
|
|
looks good man, you have been busy! I'll be looking for the final product.

| Hefay |
| (Poster) |
| 04/10/06 02:23 AM |

|
|
|
nice
| ALCAP2ONE |
| (Post Master Supreme) |
| 04/11/06 04:09 PM |

|
|
|
amazing
| SiAdam |
| (Post Master Supreme) |
| 04/12/06 09:11 AM |
|
|
|
|
If I have learned anything, it's to label parts and bolts.
I actually get a bag of zip locks and take a magic marker and write on it what it is and sometimes where it goes..
Helps ALOT on the rebuild...
Smoother/quicker...
| si1999 |
| (Newbie) |
| 04/17/06 10:05 PM |
|
|
What did you do to your wheels????
They look amazing.
I think my stock si wheels need that kind of love
| teal_dx |
| (Post Master) |
| 04/18/06 09:08 AM |
|
|
|
|
here you go, w/ pics http://forums.clubsi.com/showflat.php?Cat=0&Number=6734176
have fun!
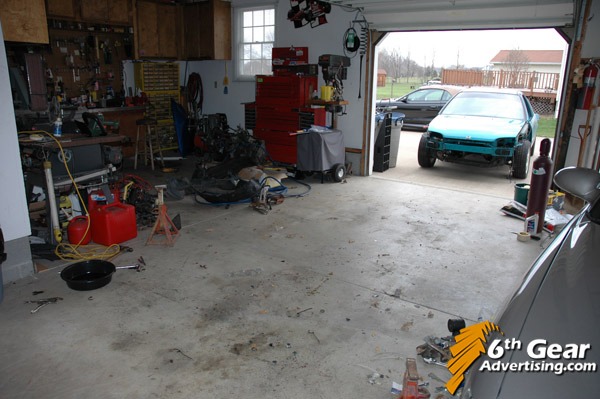
got lazy over the weekend, didn't do too much on the car....
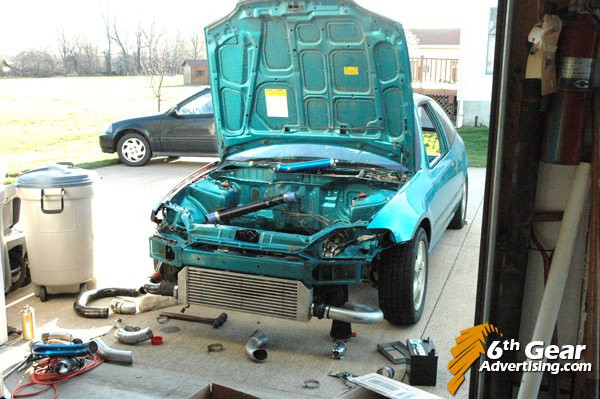
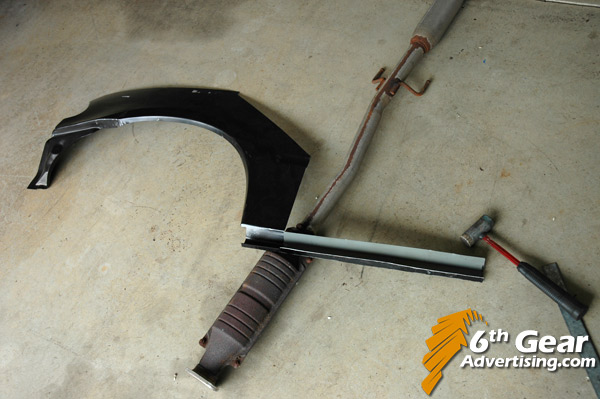
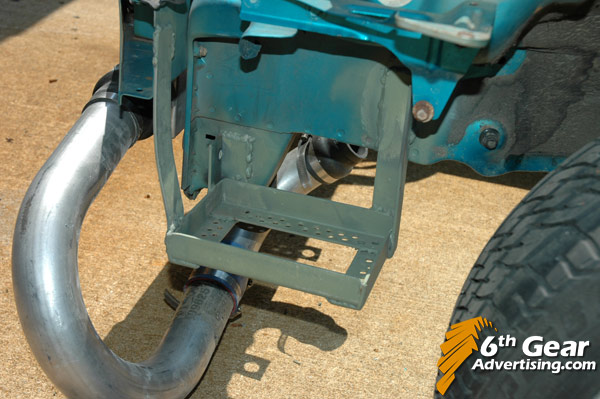
figured out the fmic mounting and puzzle of piping that came in a box with a bunch of random pieces.
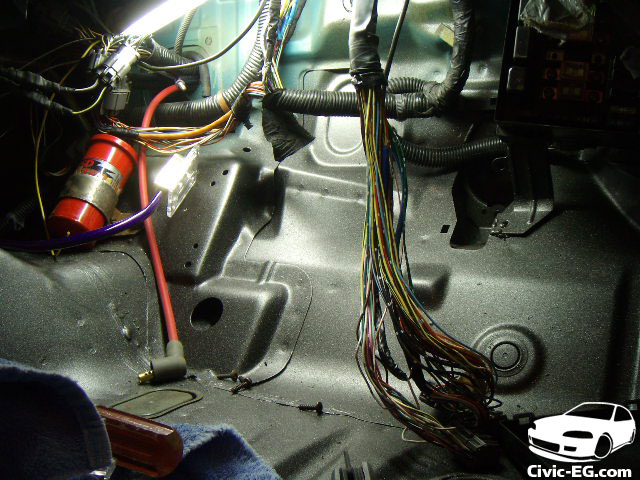
in the bottom right you might have seen my "poor man's" Optima battery:
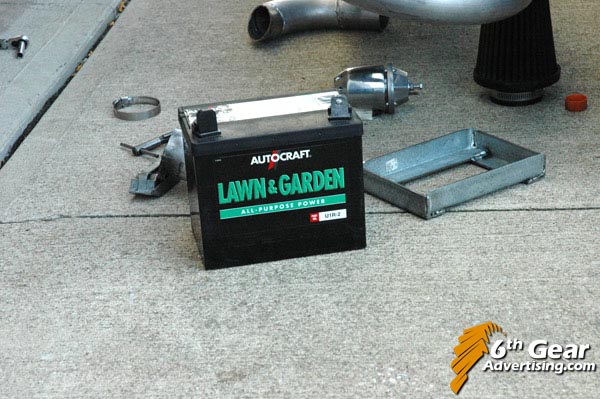
weighs about 12 lbs, cost $25
Technically it is not as good since it is not sealed like the Optima batteries, but I'm not mounting it inside the car so no setback. That's all for now!
| underESTIMATED |
| (Post Master Sr) |
| 04/18/06 05:09 PM |
|
|
|
|
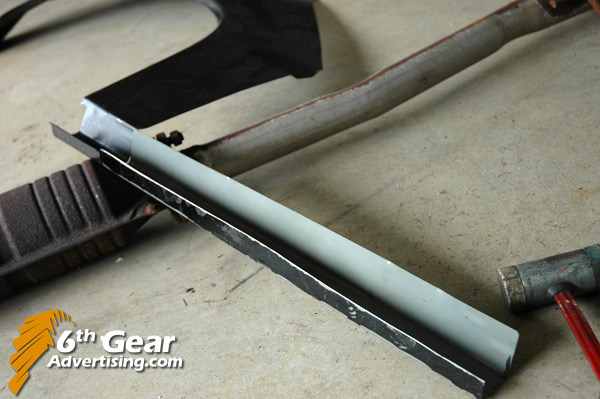
The driver's side hardpipe looks like it'll be a very close fit inside the bumper.
| si1999 |
| (Newbie) |
| 04/18/06 10:03 PM |
|
|
Thanks for the great link!!
| teal_dx |
| (Post Master) |
| 04/28/06 09:11 AM |
|
|
|
|
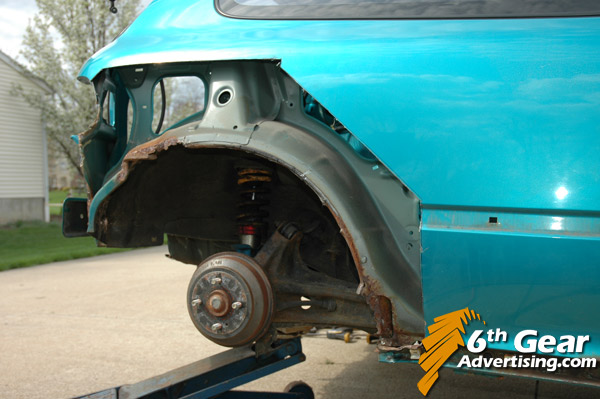
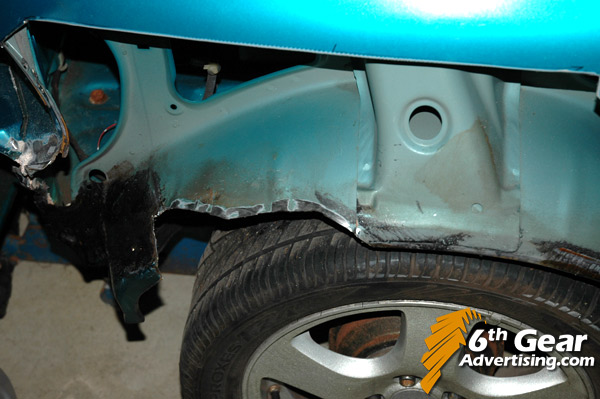
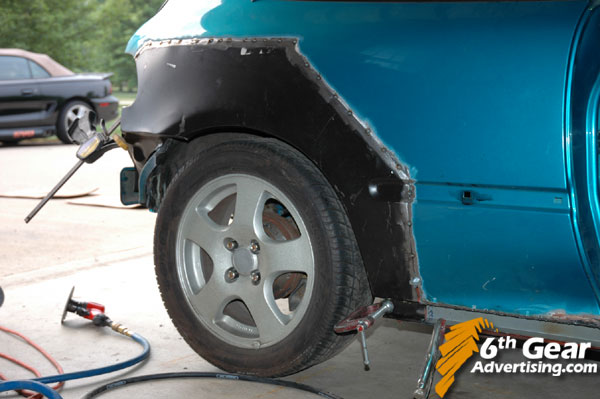
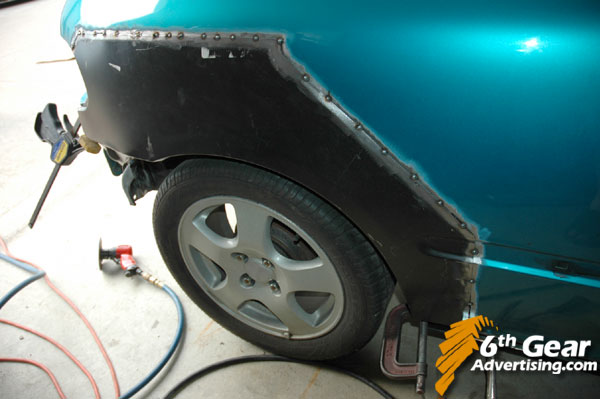
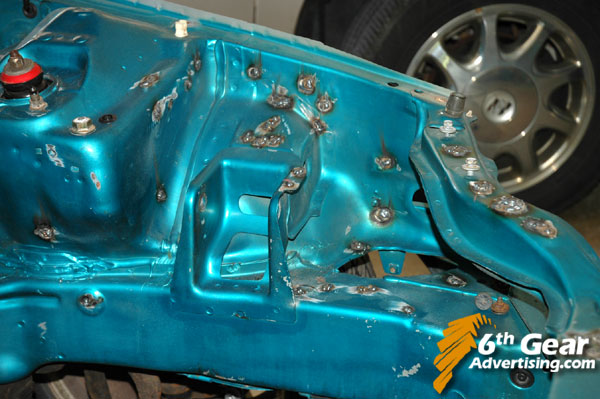
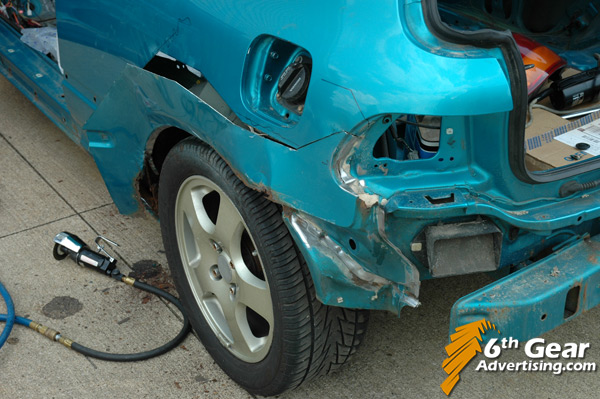
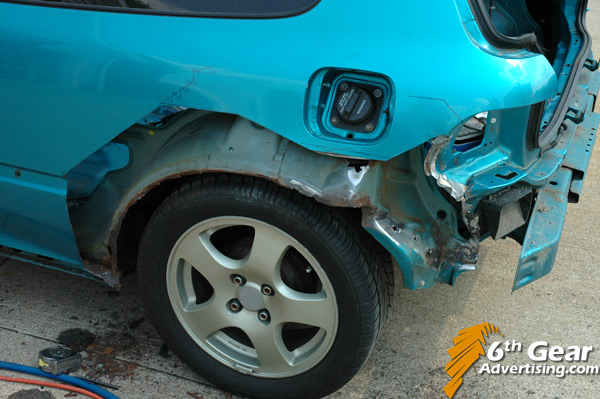
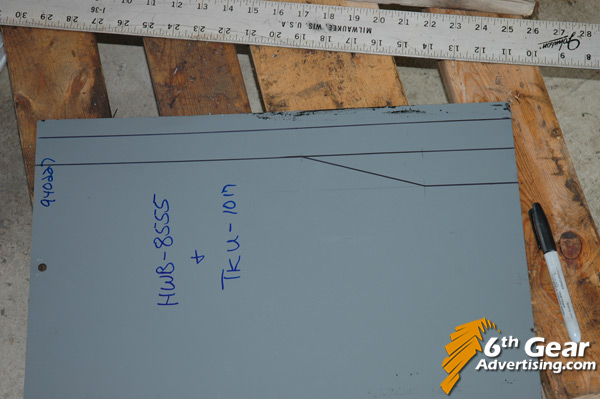
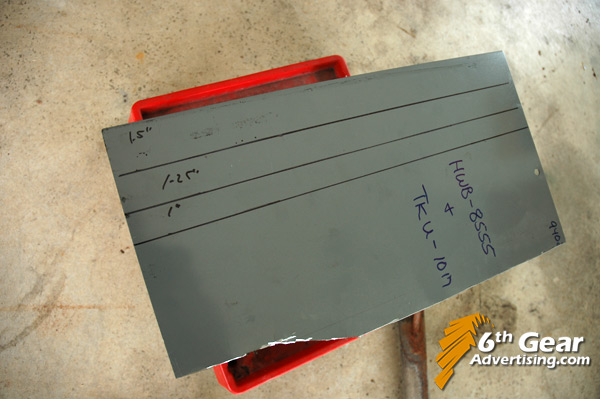
The surgery has begun!!
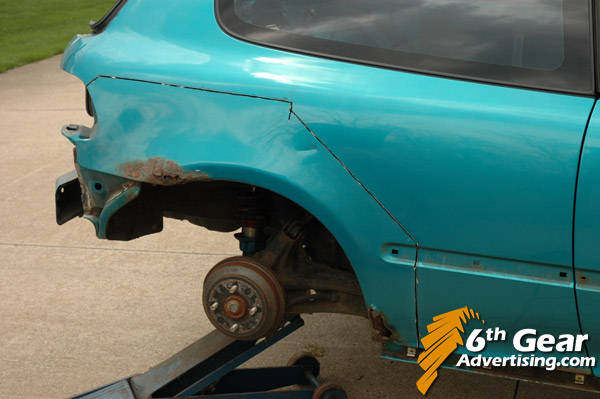
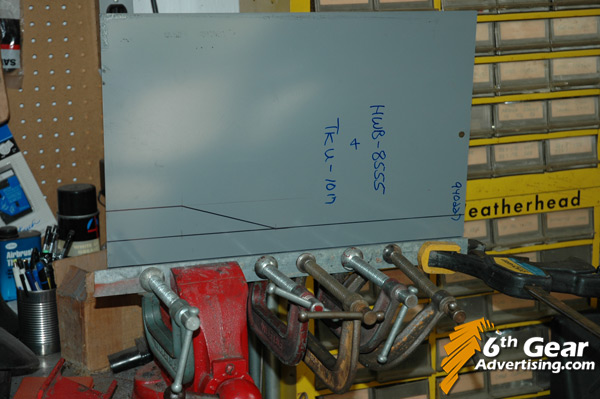
first I drew a template and cut just inside the line (not enough is safer than too much)
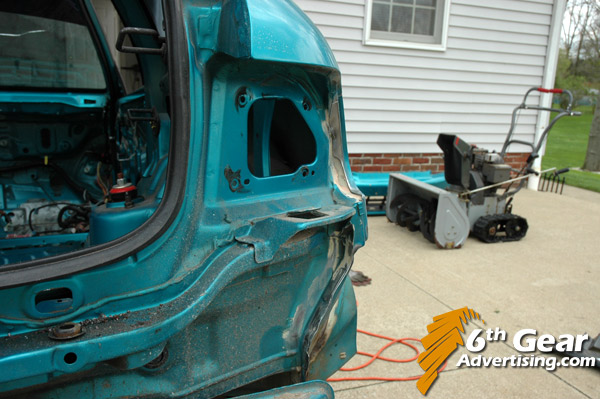
next had to use a wire wheel on a drill to scrape off all of the panel bond, then was able to find the spot welds and drill every one of them out

Pryed it apart with a mallet & a flathead screwdriver, only to find more spot welds to drill out...
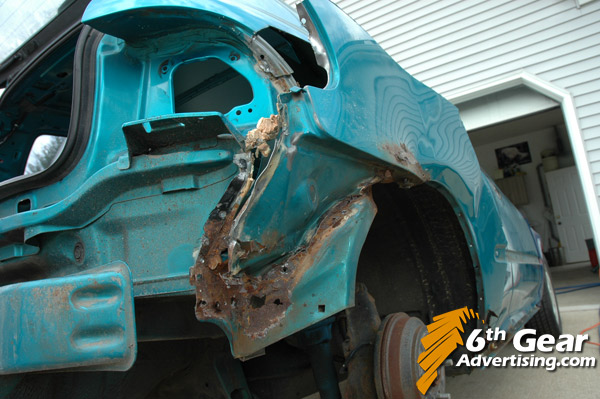
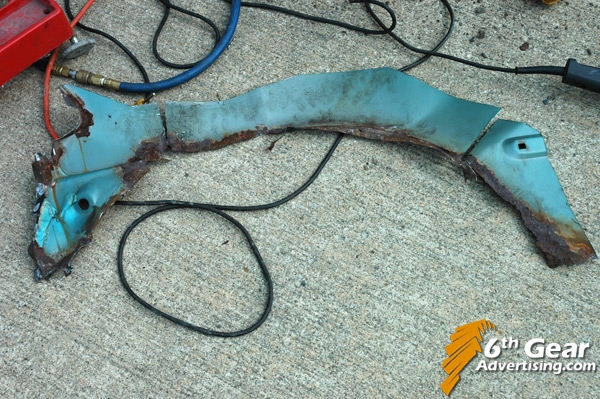
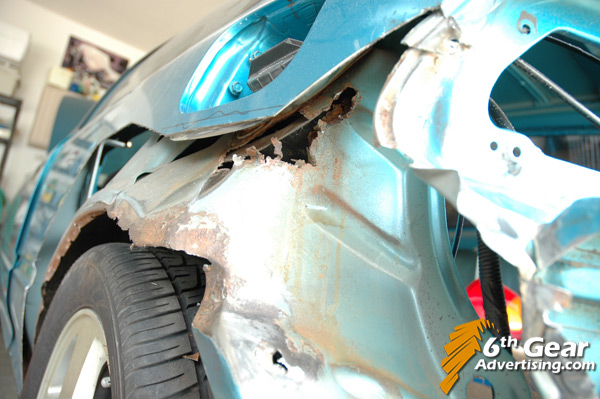
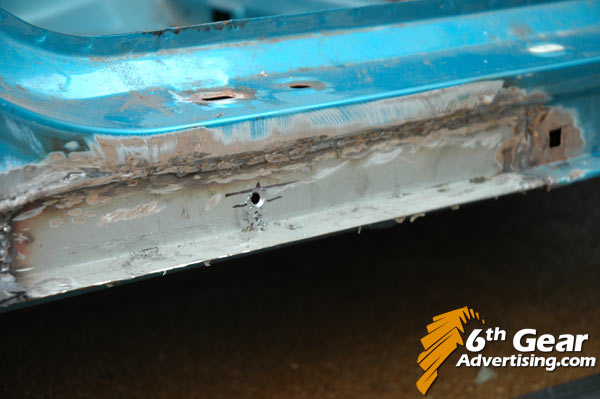
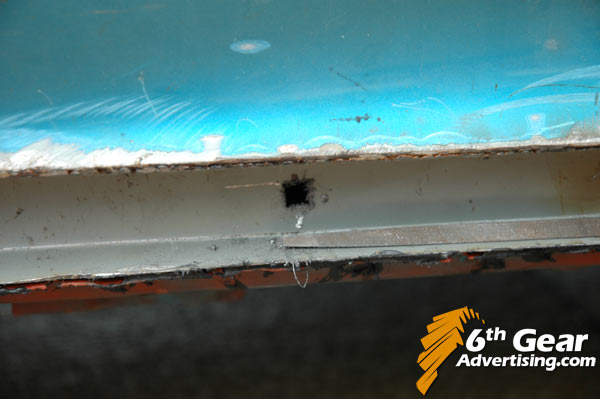
Finally drilled them all and was able to pull the panel out.
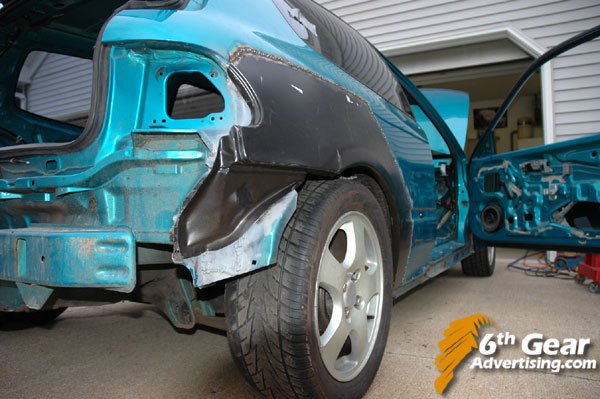
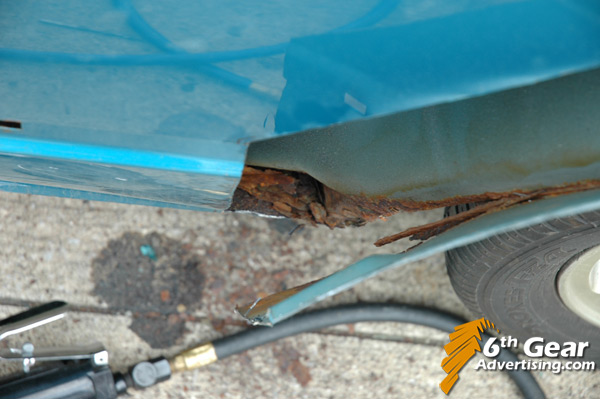
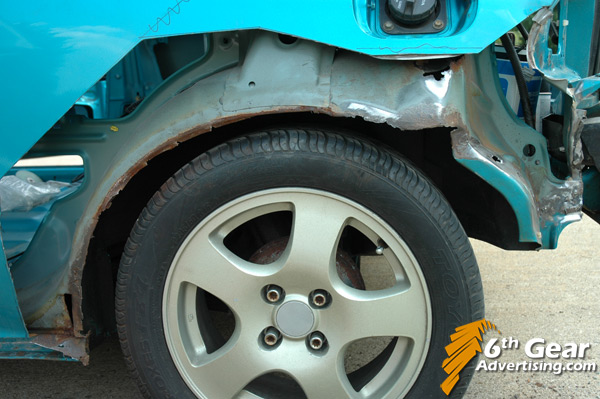
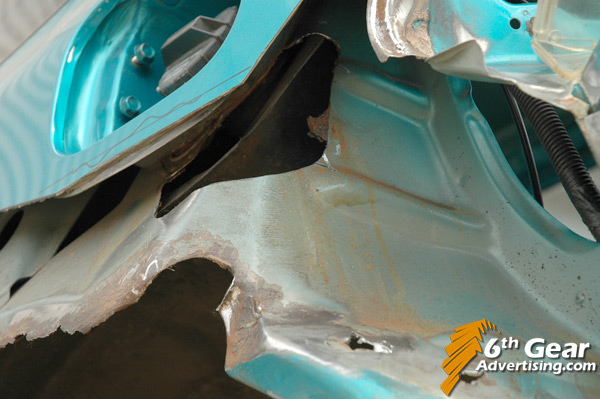
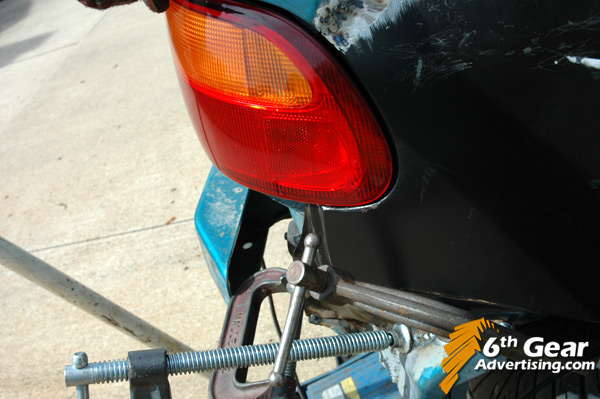
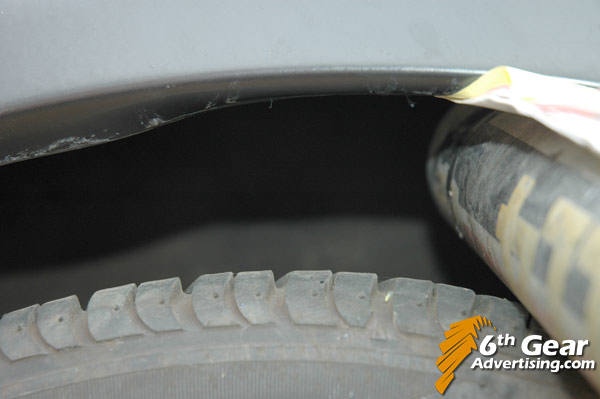
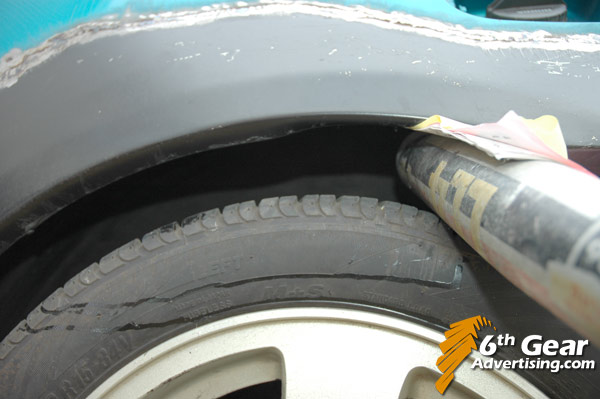
Looking into the top of the wheel well, you can see the black adhesive strip that Honda used on the seam to prevent rust from starting.

guess it didn't work as well as they thought

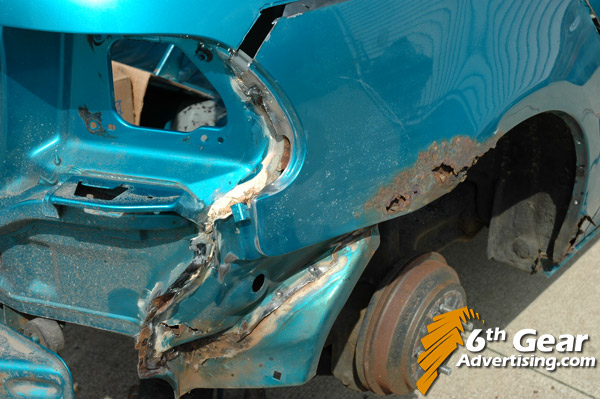
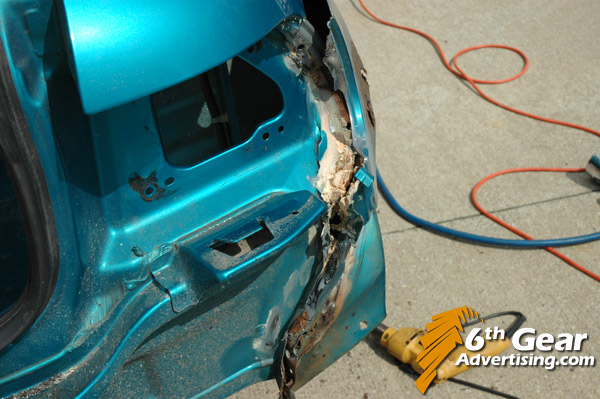
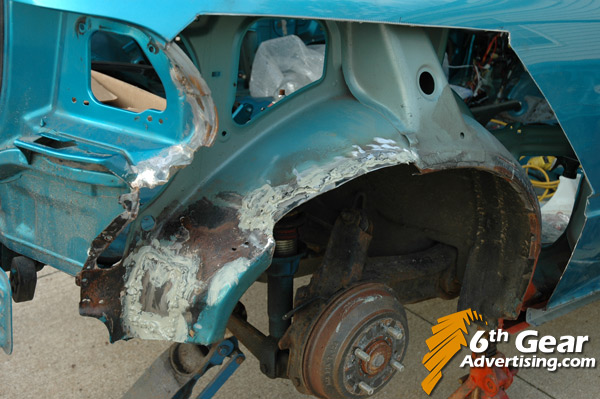
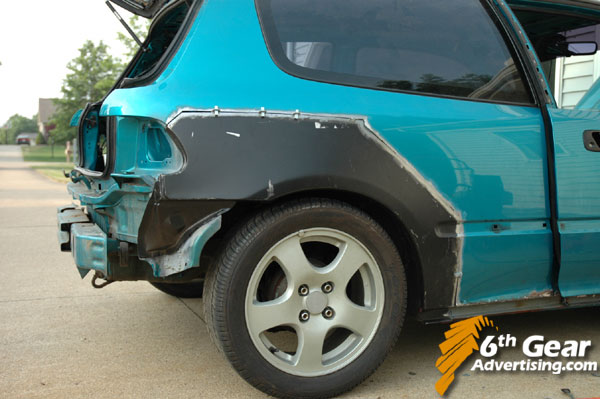
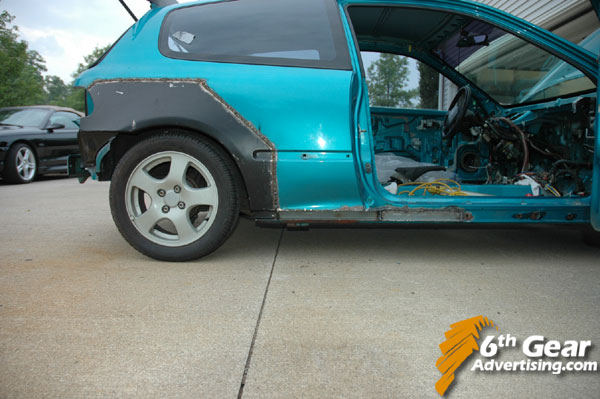
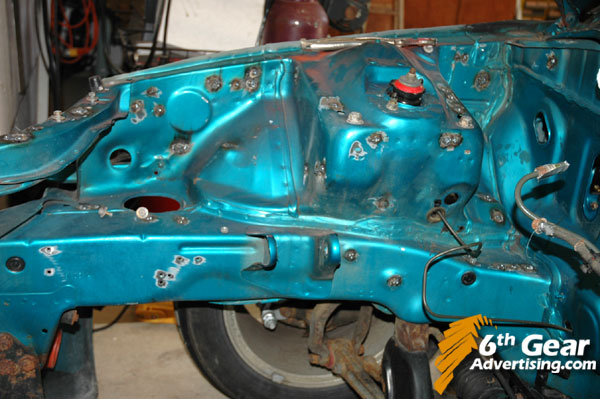
drilled the rest of the spot welds out from the fender lip and got the panel off.
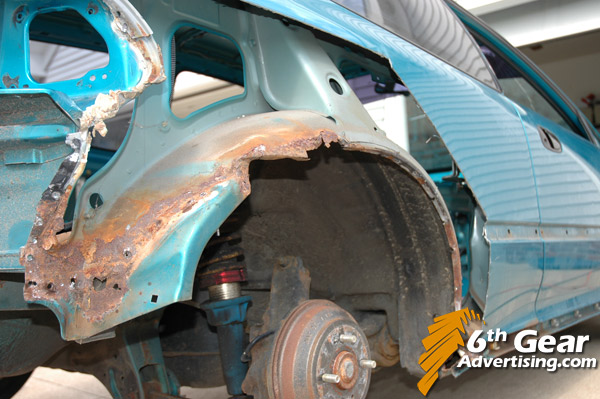
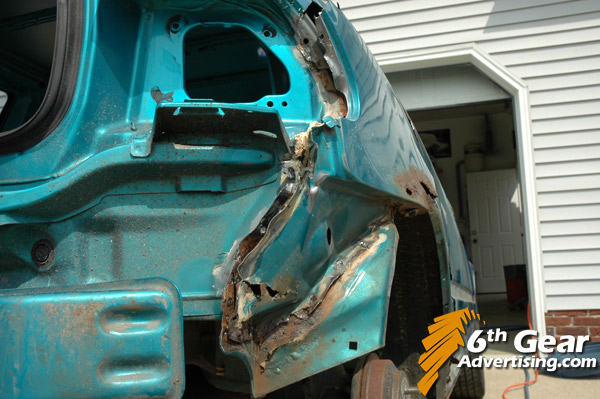
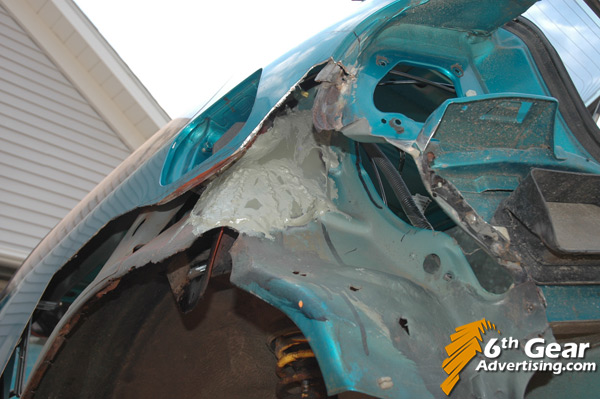
damn... gonna have to do some fabricating here, but it doesnt need to look pretty since it won't be seen.
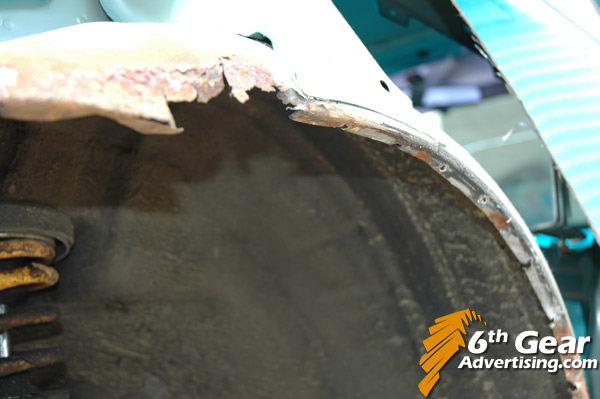
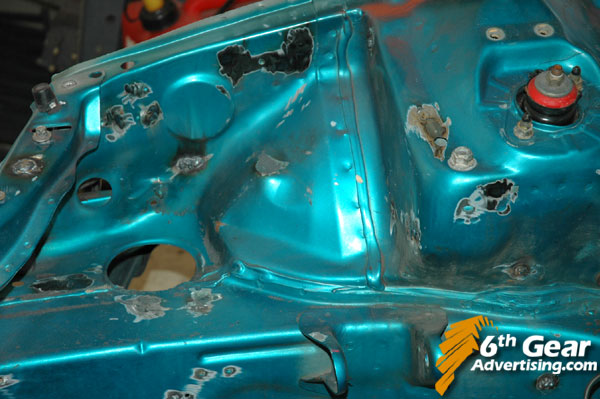
the spotwelds in the wheel well, and the ones that were rusted away near the top.
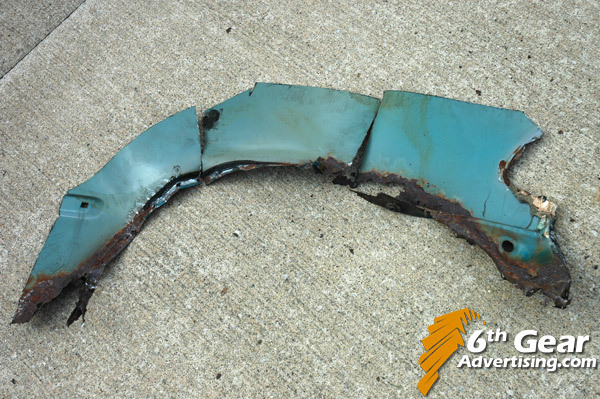
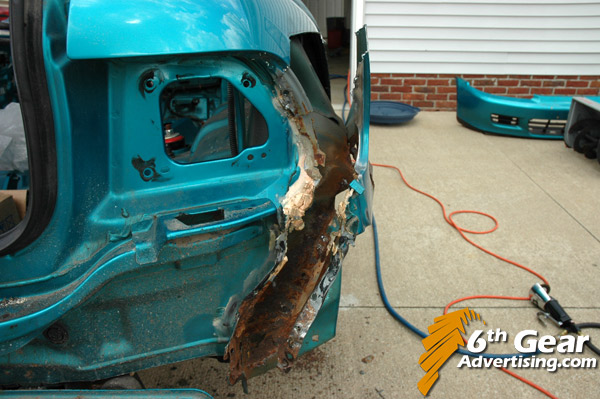
Inside of the oem panel

Now I know why the body shop told me $3500
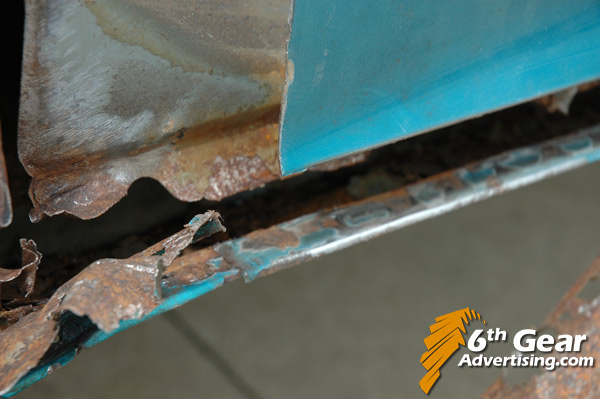
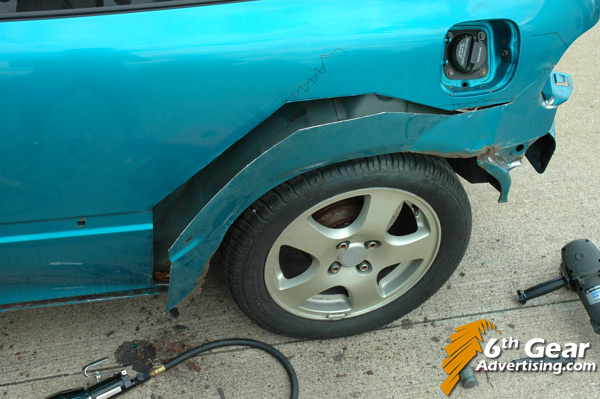
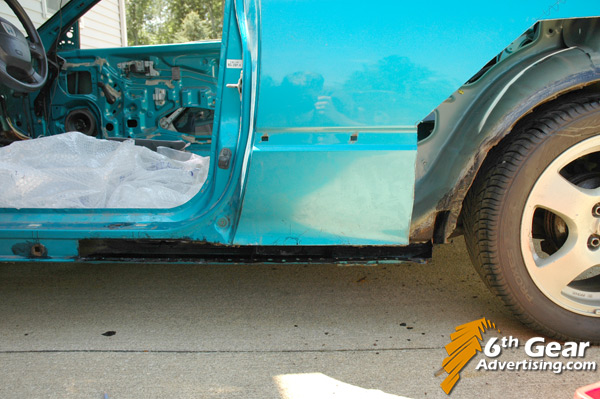
 If I wasn't this far along and didn't install urethane bushings I'd sell this one and look for a rust-free hatch. If you're ever looking at buying a rust free civic, be sure to take out the interior panel and have a look from the inside. Check where the fender meets the bumper and where the fender meets the rocker panel. That's where it eats from the inside out. 5-6 years ago I had one tiny bubble in the paint on the pass side and the driver side looked perfect lol. There will definitely be no more winters after this!
That's all for this week, stay tuned.......
| Mad Hungarian? |
| (Post Master Supreme) |
| 04/28/06 10:04 AM |
|
|
|
|
looks like it had the 92-95 honda cancer
| tgbastau |
| (Member) |
| 05/18/06 08:01 AM |
|
|
|
|
Quote:
Wow, that really makes me nervous to take mine apart now, I'm sure it looks like this or worse.
Also, any updates??
| teal_dx |
| (Post Master) |
| 05/31/06 03:54 PM |
|
|
|
|
Bryce, it would have been 100x easier for me to just buy another hatch. I was only doing this because I had replaced all the bushings w/ urethane ones, but even doing that again would be way easier and quicker than doing this body work, as I am finding out
Oh well I started so I might as well finish!
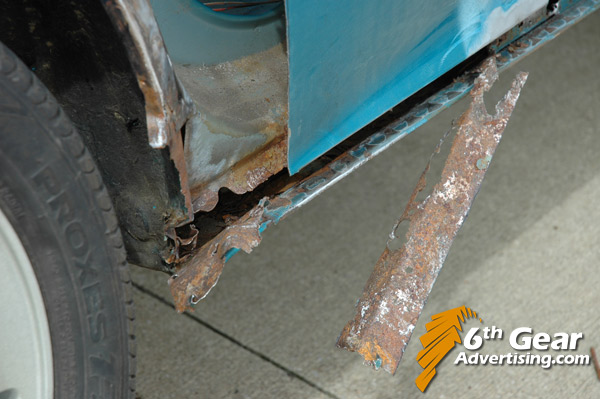
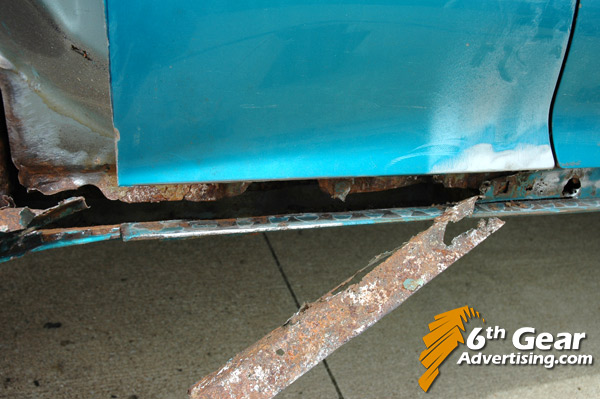
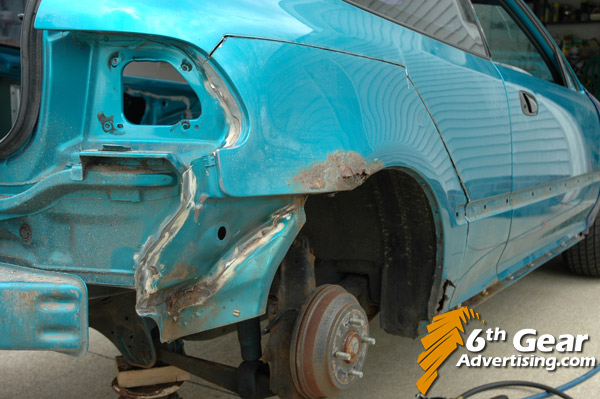
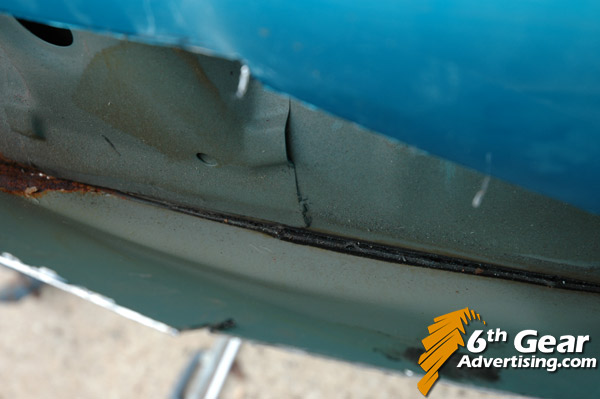
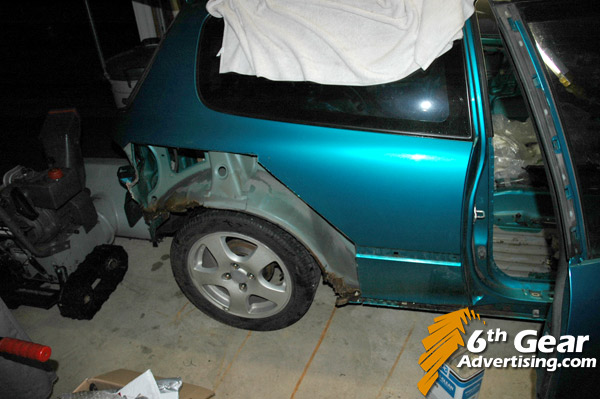
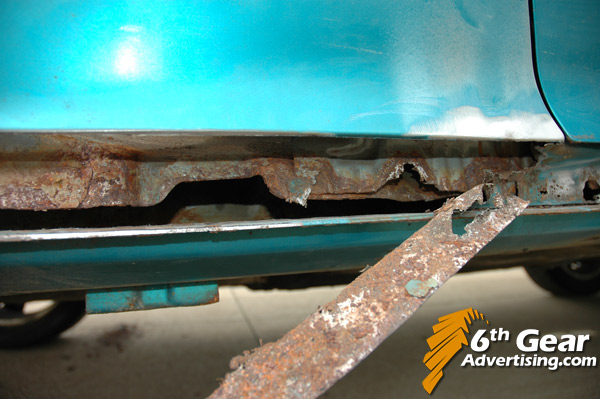
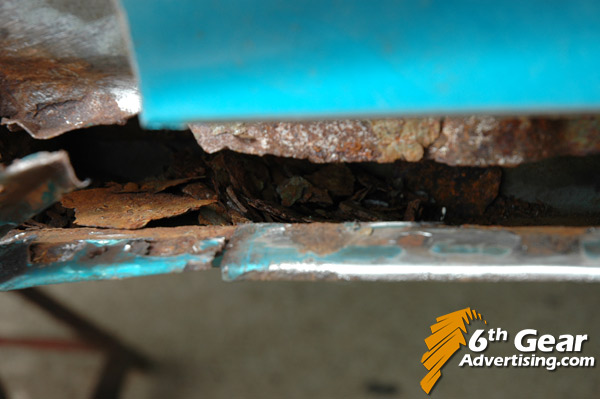
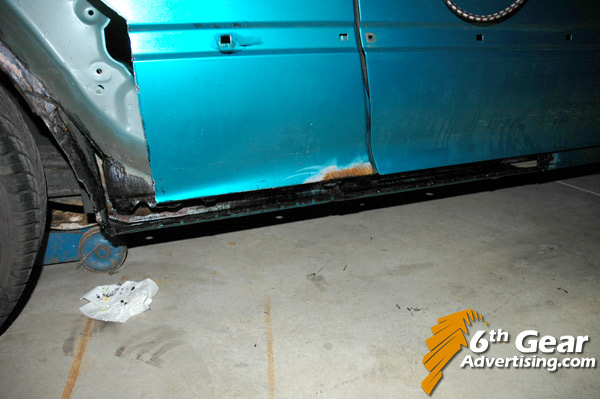
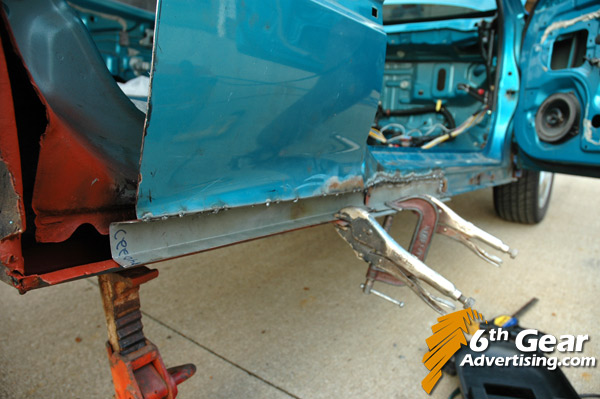
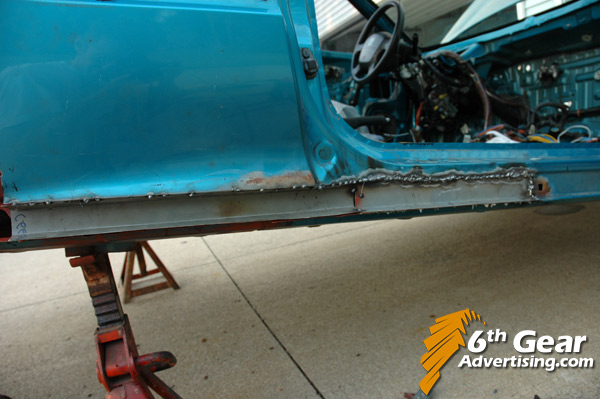
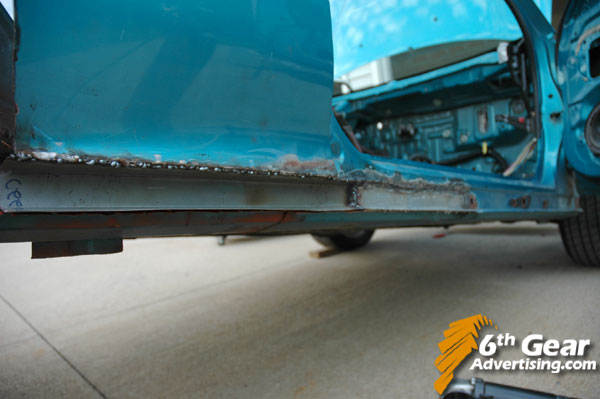
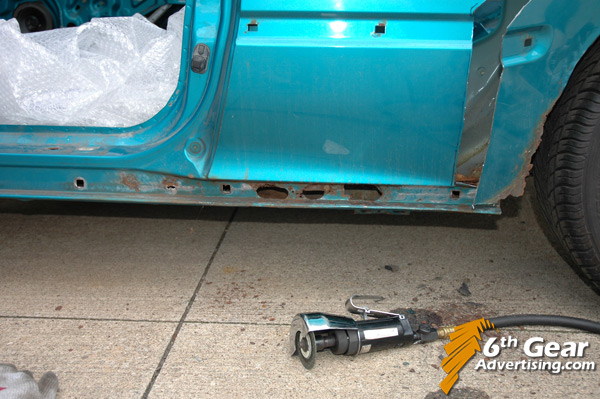
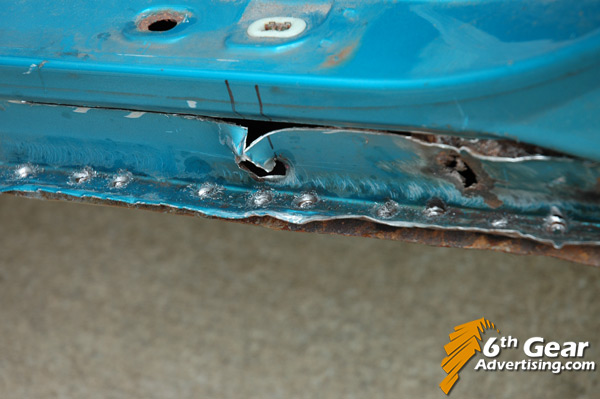
the rocker panels were rotted
the inside was only surface rust though. Just the part where the side skirts attached were rusted through.
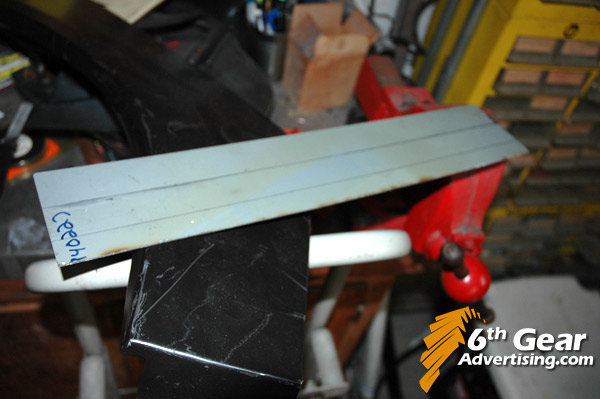
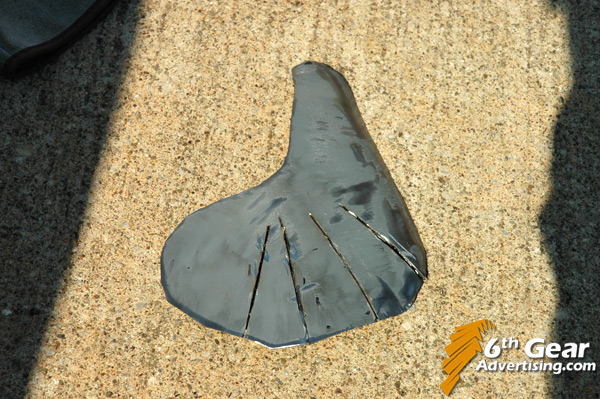
had to make new rocker panels:
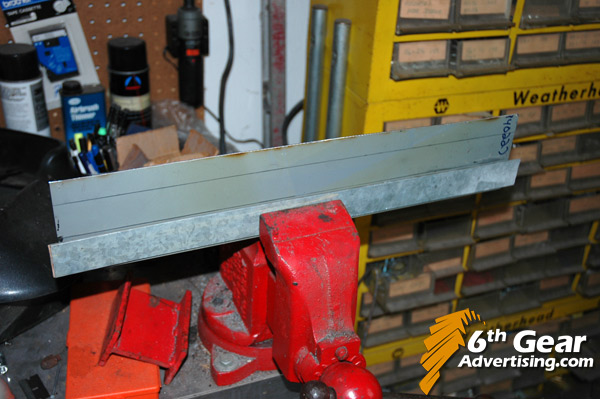
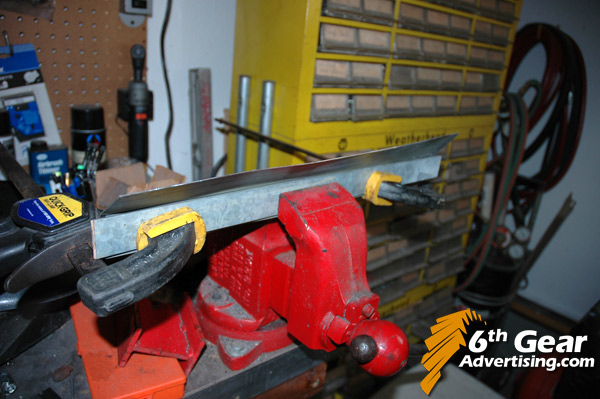
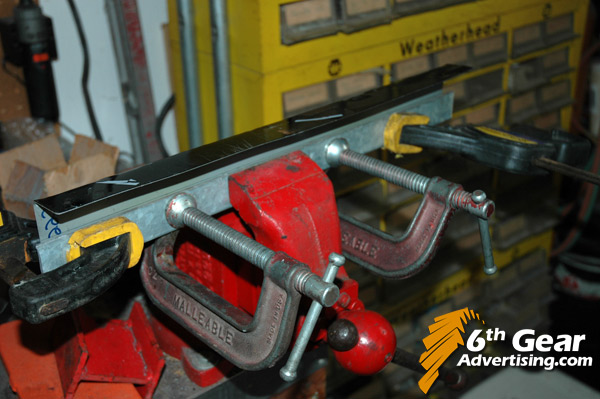
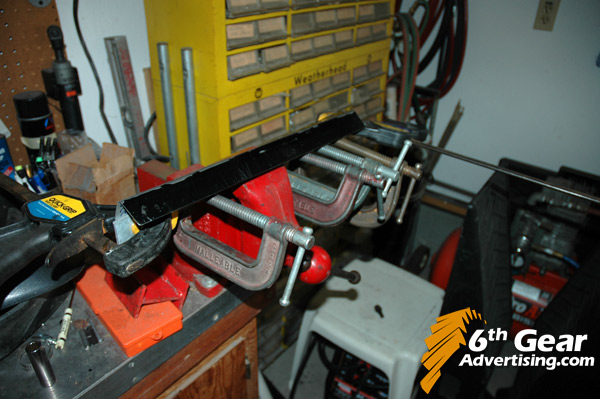
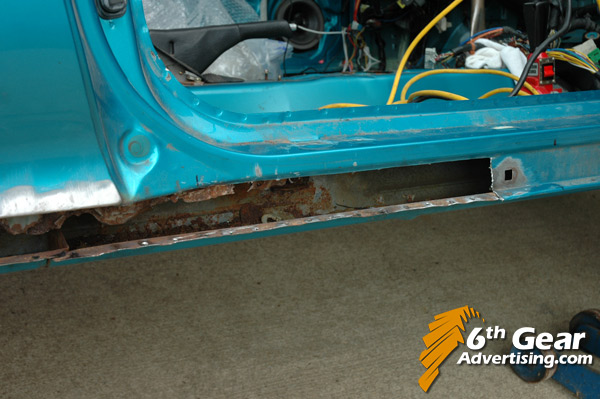
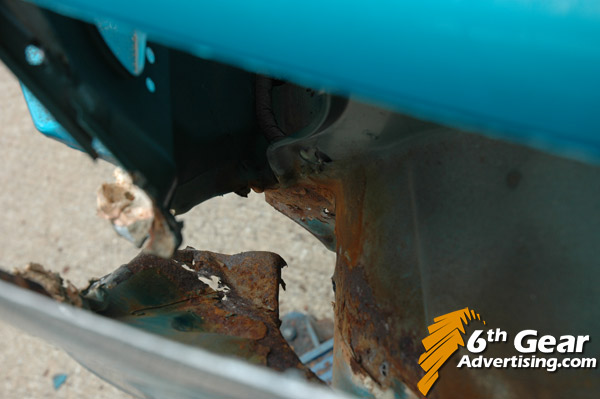
and the rotten metal had to be cut out all the way up past the door about a foot and a half.

this piece was only 2 sided, didn't get a final pic after I cut the top off.
got those hard to reach areas as clean as I could and applied rust inhibitor
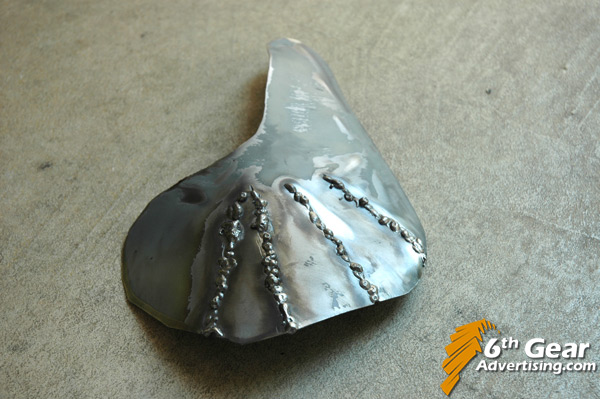
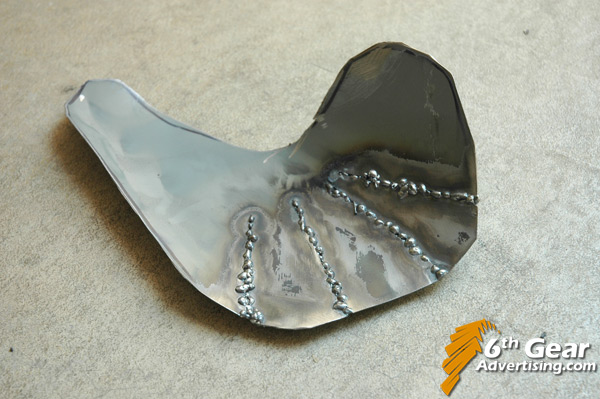
the inner wheel well cut out areas that were swiss cheese have new metal welded in
inside of rocker panel & back of new sheetmetal was primered & welded on:
that's it for now... next I'm gonna work on getting that main quarter in
| Stryker124 |
| (Major Member) |
| 05/31/06 04:53 PM |
|
|
Damn man, that is a hell of a lot of work! Nice job though.
What rust inhibitor are you using?
| Mad Hungarian? |
| (Post Master Supreme) |
| 05/31/06 11:27 PM |
|
|
|
|
holy mother of god, you have truly lost your marbles...lol. You have performed some serious surgery on that honda cancer ridden vehicle. Seriously hats off to you. I can't believe the time you have put into that SOB. I can't wait to see it on the road again. Ya know the sad part is, there are very few people that will ever know just how much you put into it work wise. The good part is that you'll always have that feeling of self satisfaction that you did all of that yourself.
| AllNOS99Si |
| (Post Master Jr) |
| 06/02/06 07:38 AM |

|
|
|
looks like a hellula lotta work for you. My hats off to you for doing it yourself.

| shupadupa |
| (Post Master Sr) |
| 06/02/06 08:55 AM |

|
|
|
jesus, talk about a weekend(s) project. Good work Brian.
| teal_dx |
| (Post Master) |
| 06/19/06 12:00 PM |
|
|
|
|
finally feel like I'm getting somewhere on the bodywork....
new rocker panel
new quarter panel. was a PITA to get it clamped in place perfectly. I got pissed eventually and took all the clamps off except for on the bottom and just used my other hand to hold it. Actually worked better!
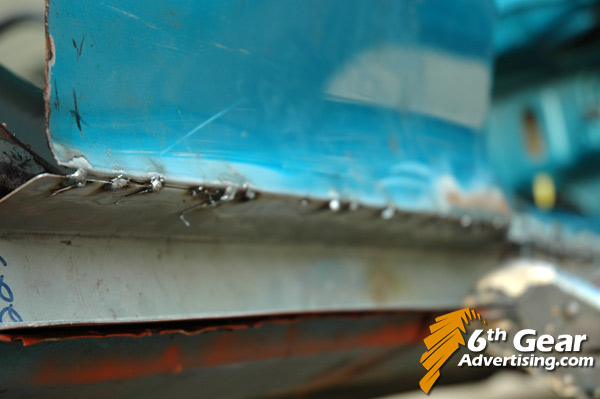
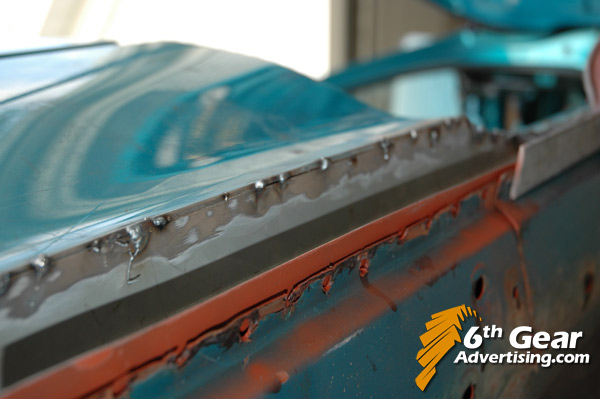
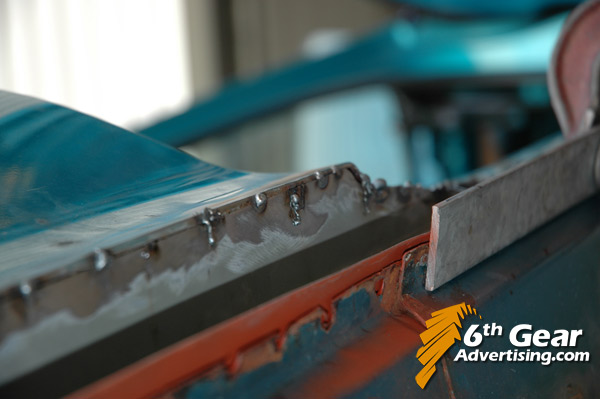
tacked in place
welded in. Welding beads look pretty, but to keep the metal from warping from heat you have to tack, then tack in between those tacks, then tack in between those etc... so that leaves you with alot of extra grinding to do afterwards.
Started shaving the engine bay...
Every hole is grinded to remove the paint, then welded in.
then those welds are ground down flush with the sheetmetal and uneven areas are welded more and ground down more. repeat process
battery, fusebox, and cruise control holes are too big, need to cut out a piece of sheet metal for these.
just remember which ones you need to keep
ran out of argon so called it a day for welding. that is all for this week of project teal
the block should be back from the machine shop soon
| SiAdam |
| (Post Master Supreme) |
| 06/19/06 12:25 PM |
|
|
|
|
Lookin good, where did u get that rear quarter and the piece for the rocker panel underneath...?
That seems like the smart way to go...bondo =
|
TenTwelve
|
| (Post Master Supreme) |
| 06/19/06 10:43 PM |
|
|
|
|
You are out of your fucking mind.
| SiWheelman |
| (Post Master) |
| 06/19/06 10:50 PM |
|
|
|
|
damn dude it looks amazing! I'm back in town now and have the car up and running, let me know if you ever need some help or want to meet up.
| tgbastau |
| (Member) |
| 06/20/06 08:14 AM |
|
|
|
|
Damn dude, that work is seriously impressive. I may have to head over to Crackron to see this in person!
By the way, you don't have this decay on the other side, do you?
| teal_dx |
| (Post Master) |
| 06/20/06 08:34 AM |
|
|
|
|
Si adam- there's a place up here that I bought the fenders from, the rocker panels I could not find so I bent some up from flat pieces of sheet metal.
Bryce- Yeah the other side is the same
only exception is that there is the gas door opening which means some extra cutting around and less access from the inside. The rocker panels are just as rotted too on that side. Mark- I wouldnt ask any friend to help with body work, this shit sucks! I'll give you a call when I am doing something fun like putting the motor back in though! But that might be a while so I gotta see your turbo monster sometime soon...
| SiAdam |
| (Post Master Supreme) |
| 06/21/06 09:58 AM |
|
|
|
|
Cool, thanks.
| teal_dx |
| (Post Master) |
| 07/28/06 12:27 PM |
|
|
|
|
Update: heavy body work is close to done, almost time to sand & fill
pics of the progress (in order):
pass side rocker was swiss cheese dammit
nice pile of rust in my car
the carcass
oh thats shitty
almost as shitty as drilling out spot welds

I'll get back to this in a bit...
coated w/ rust inhibitor
making rocker panels doesn't rock, I folded this one backwards & had to re-bend it lol
finished up the pass side...

fits good
back to that rust hole problem....
painted w/ etching primer, tack welded, sealed edges in front & back
rear quarter and rocker panel in
it's starting to look like a shell again
AND....
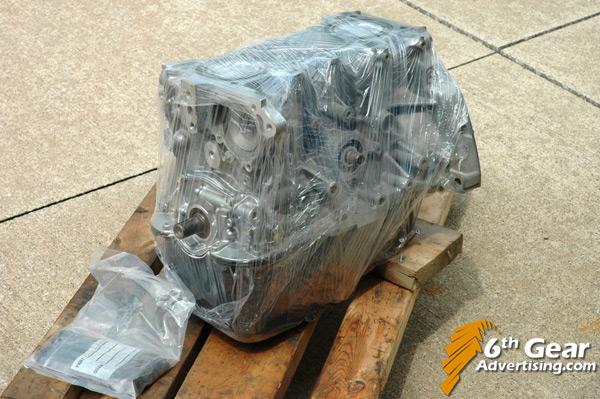
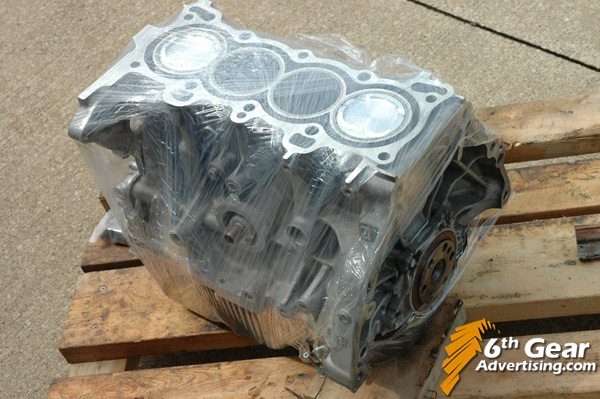
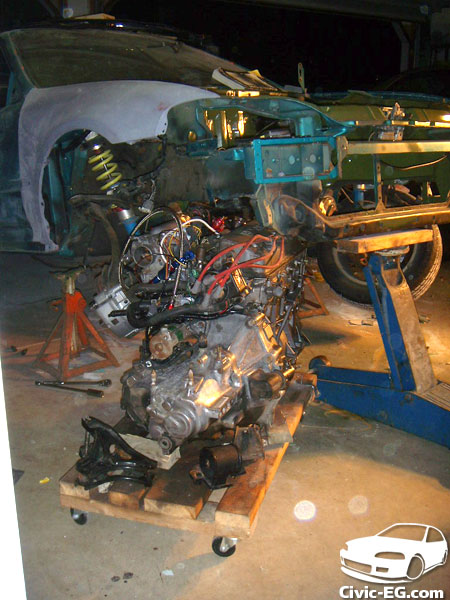
back from Michael's
leaving it wrapped up untill the body is done... gonna wait till it is in to put the top end on so I won't have to lift the car up so high again to put it in through the bottom.
that's all for now, I'm seeing it done in Aug sometime I hope.
Thing that sucks is plates expire aug 3 and it has to pass echeck before I can get new tags. Still gotta get some miles on the new motor before I take it to the echeck bastards... gonna be putting some miles on w/ expired tags I guess

After that turbo is going on and getting it tuned
| tgbastau |
| (Member) |
| 07/28/06 01:47 PM |
|
|
|
|
fuck yeah! I've gotta see this frankenstein shit in person!
| SiWheelman |
| (Post Master) |
| 07/28/06 06:24 PM |
|
|
|
|
good shit man, hit me up if you need some help w/ the turbo goodies or the motor install.
| teal_dx |
| (Post Master) |
| 09/29/06 02:21 PM |
|
|
|
|
havn't been keeping up on the pics lately... Body work is almost complete.

older pic from when I first started to smooth the bay
new location of the coolant overflow
new location for the battery
took this opportunity to roll the rear lip, gained about an extra inch of clearance
took notes of all the dents (there was plenty
 )
)
Drilled the holed in the new rocker panels for the side skirt clips to go in.
the clips are square.... to that means I had to file each hole into a big square. Don't have any pics of the skirts mointed, but they went on and fit better than I expected.
after pricng paint, the teal_dx is no longer going to be teal
(teal ain't cheap!) Body work is almost complete, paint pics will be here soon!That's it for now...
| D0HC |
| (Major Member) |
| 09/29/06 02:49 PM |

|
|
|
Awesome
| Stryker124 |
| (Major Member) |
| 09/29/06 07:50 PM |
|
|
Looks better and better! If you paint it a different color, you'll have to change your screenname!
| ALCAP2ONE |
| (Post Master Supreme) |
| 09/30/06 01:37 AM |
|
|
|
|
such good work
| MgSfHoBbS |
| (Post Master Sr) |
| 09/30/06 02:56 AM |
|
|
not gonna be teal?!?
mikey is gonna be pissed. lol
| tgbastau |
| (Member) |
| 10/01/06 09:03 PM |
|
|
|
|
Awesome. I can't believe the amount of restoration you're doing, by yourself. You must be one patient man.
Keep us posted!!
| stillbanned? |
| (Newbie) |
| 10/01/06 10:29 PM |
|
|
I didn't know you were so skilled.
| SiAdam |
| (Post Master Supreme) |
| 10/02/06 08:53 AM |
|
|
|
|
Coming along..
Keep up the great work bro.
| SiWheelman |
| (Post Master) |
| 10/02/06 03:37 PM |
|
|
|
|
looking badass man, keep it up
| teal_dx |
| (Post Master) |
| 01/09/07 01:51 PM |
|
|
|
|
I had to go back a few pages to find this, no update in 3 months! The weather, work, & holidays slowed me down a bit.
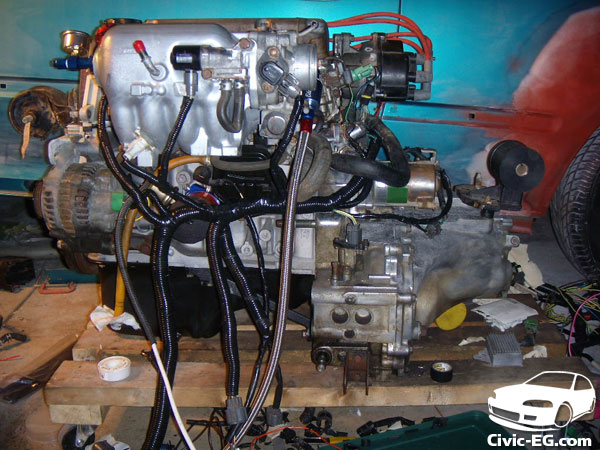
some motor pics:
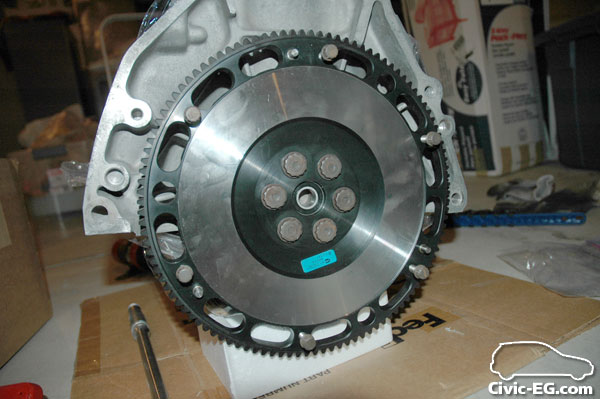
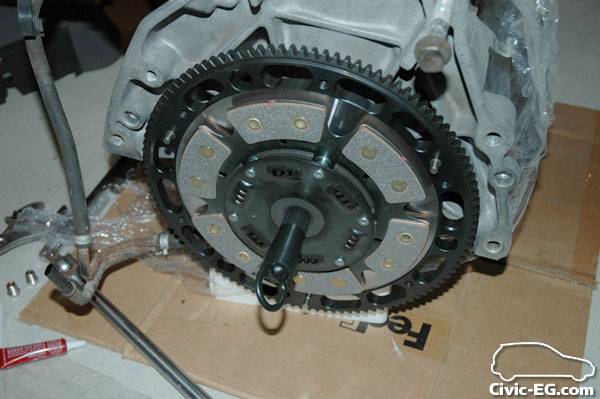
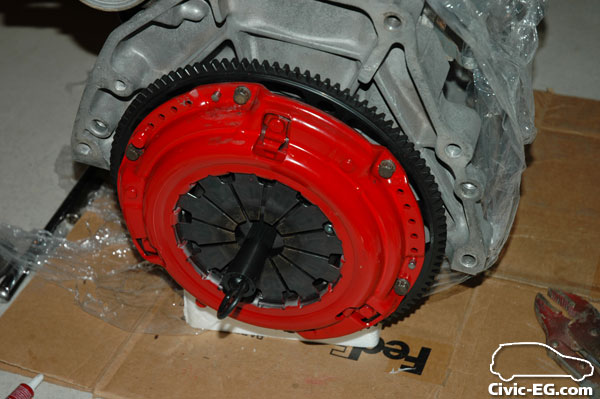
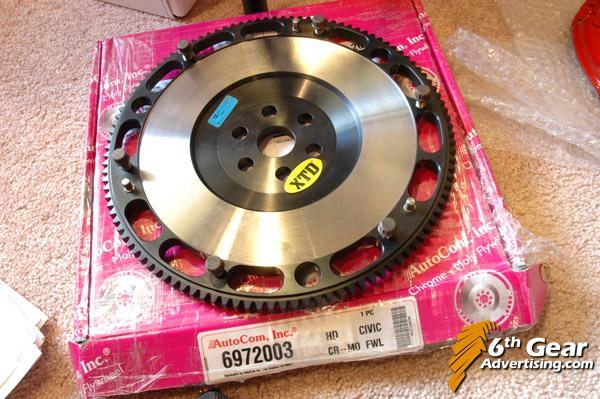
xtd 6-puck stage 3 clutch + 8lb flywheel
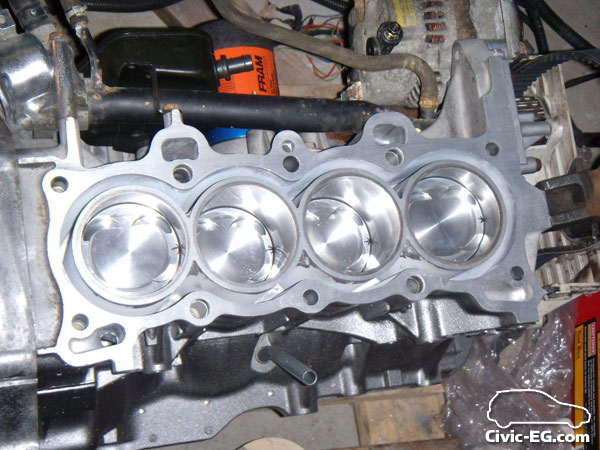
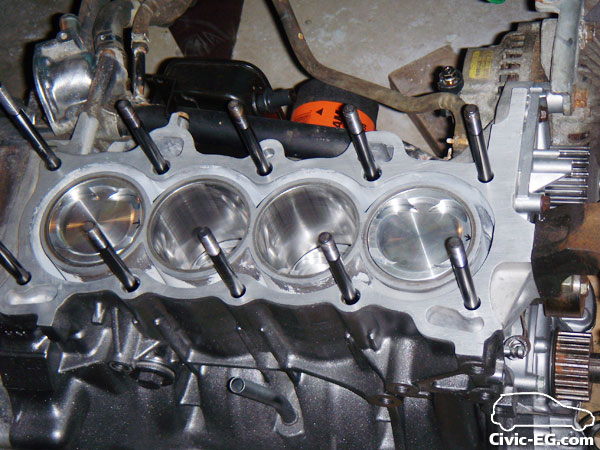
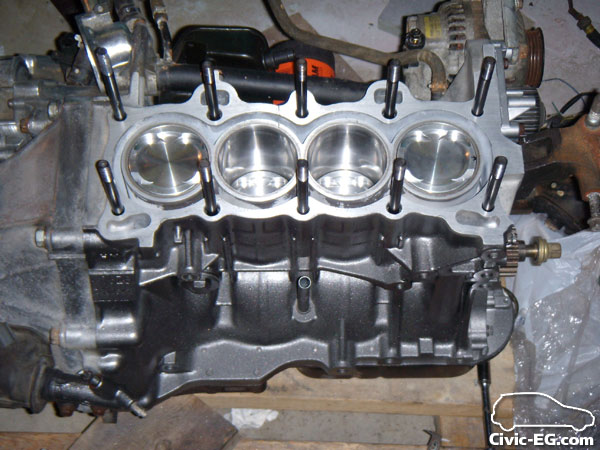
motor going back together
painted the front graphite to keep it looking nice and clean
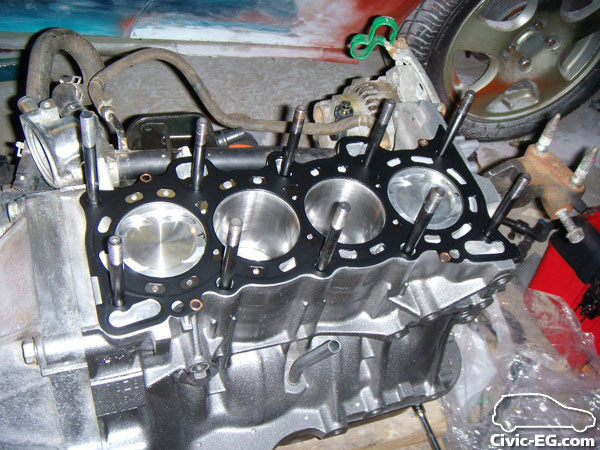
OEM headgasket FTW
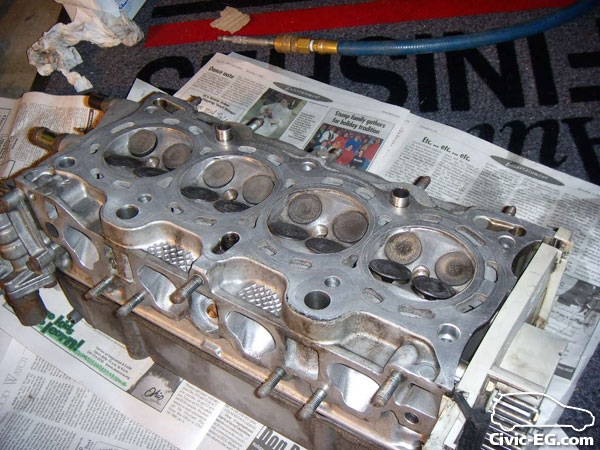

cleaned up the head. stock valves, runners & combustion chambers have been smoothed.
back together
| teal_dx |
| (Post Master) |
| 01/09/07 02:04 PM |
|
|
|
|
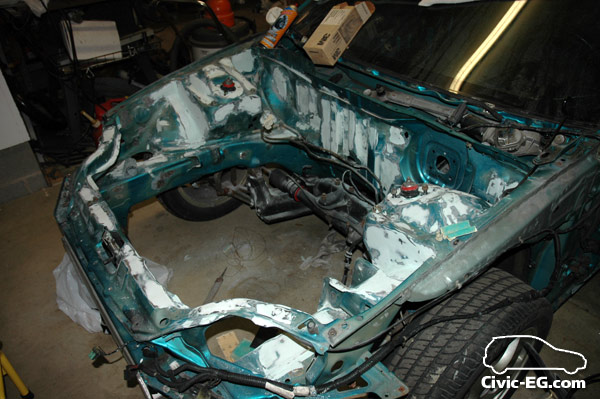
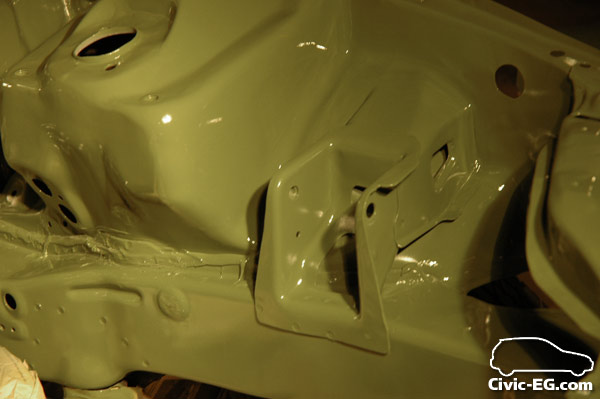
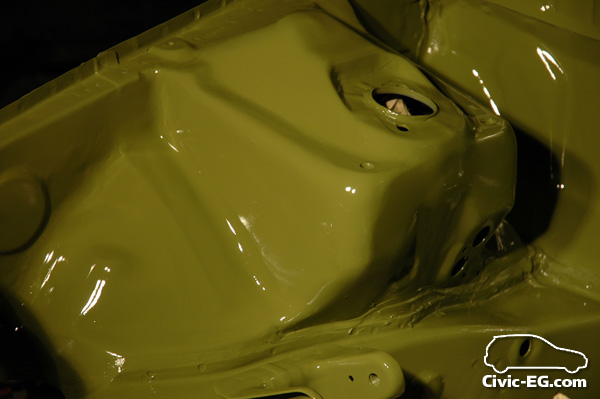
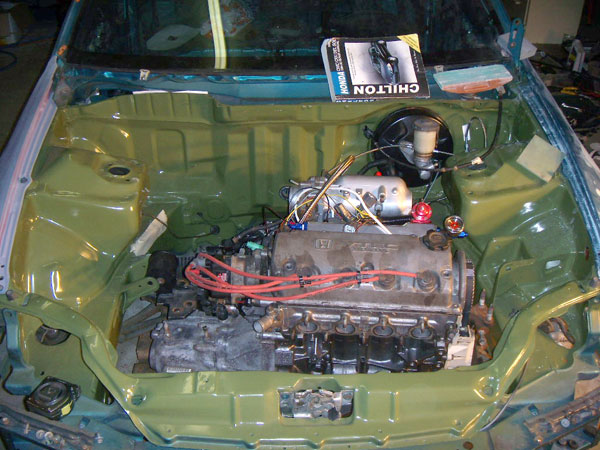
Next is the engine bay:
last time I posted it looked like this:

then it needed smoothed...
relocated some crap: coolant overflow & battery tray


then there wan LOTS of sanding...

and primer...
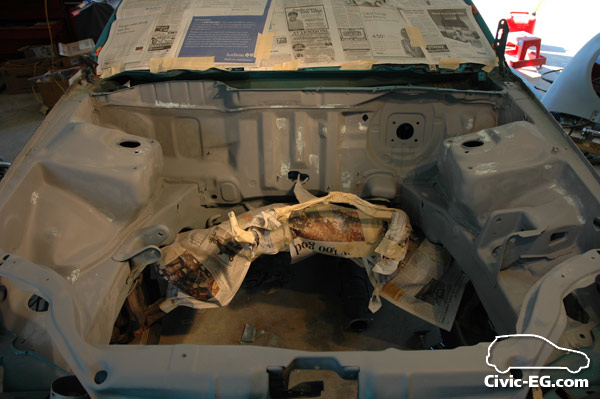
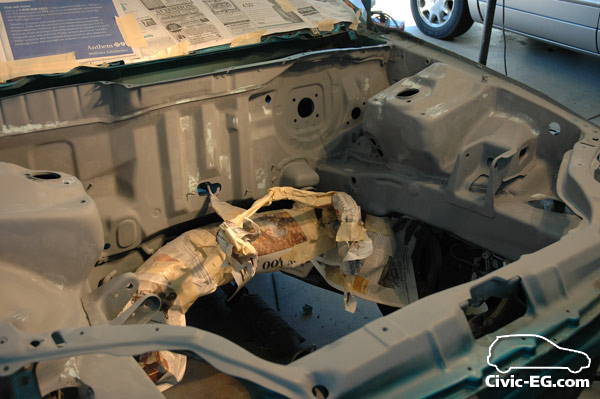
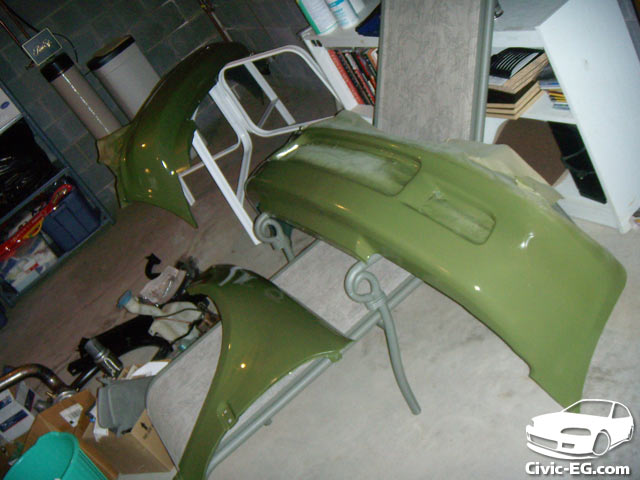
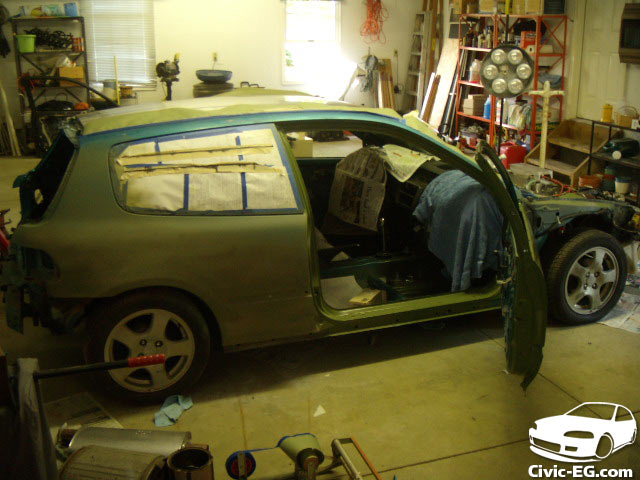
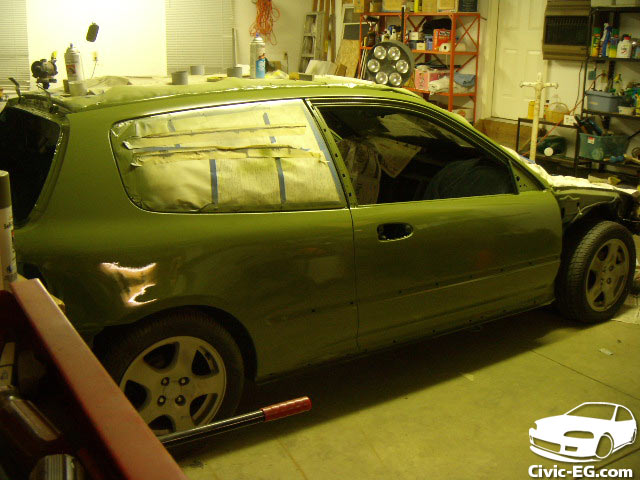
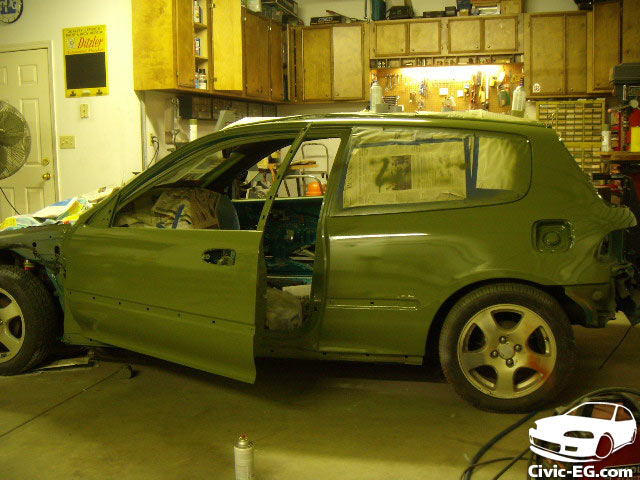
and paint!
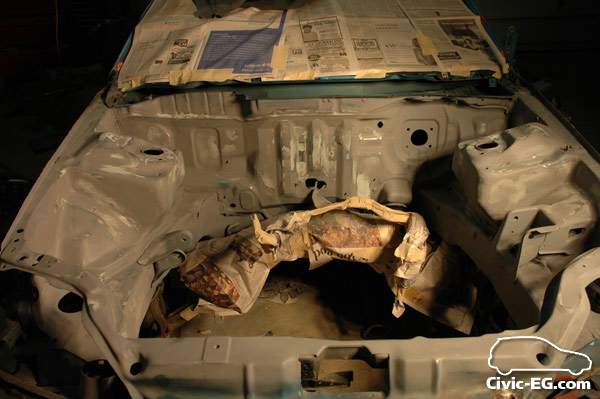
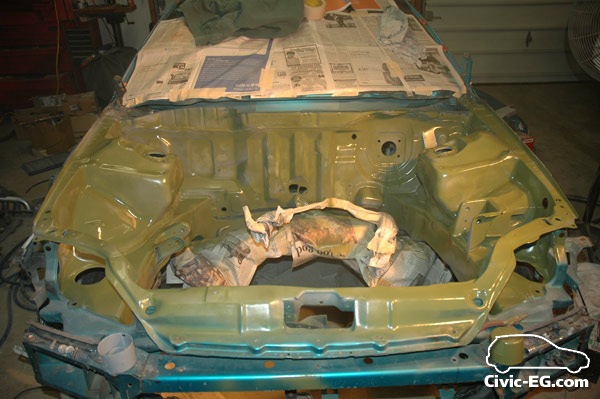
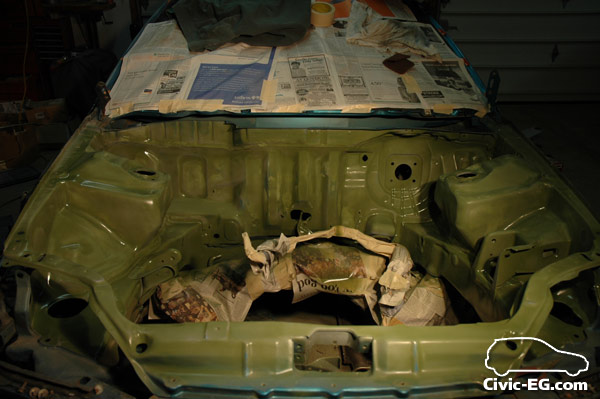
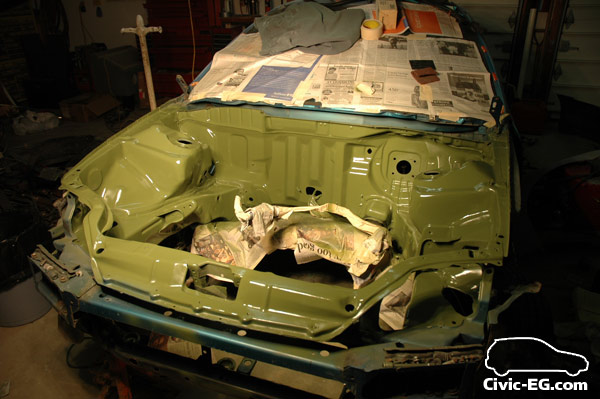
Yep teal is no more... I went with my first instinct (green) when I saw how much oem paint would have hurt the wallet. So now I have to do door jambs, but no biggie. The heat lamp makes the green look more yellowish than it actually is.
more shaved bay pics:
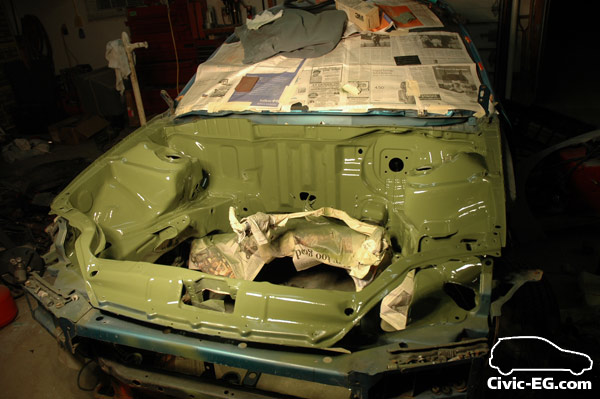
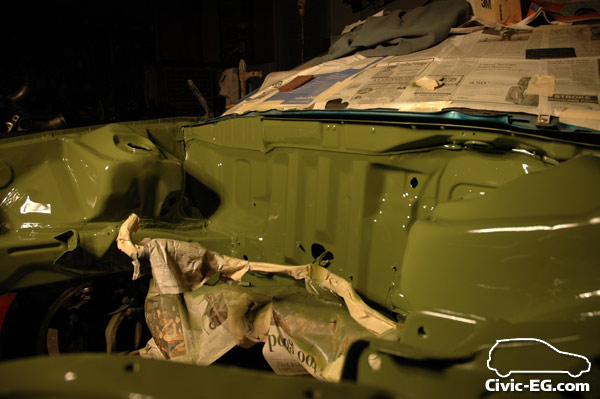
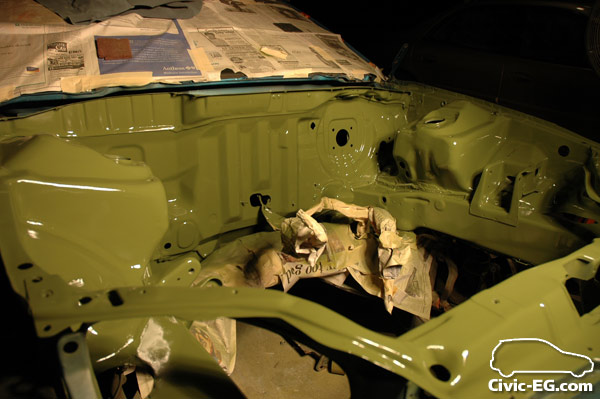
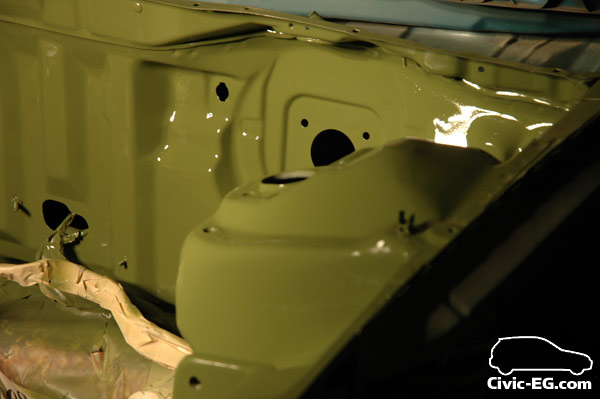
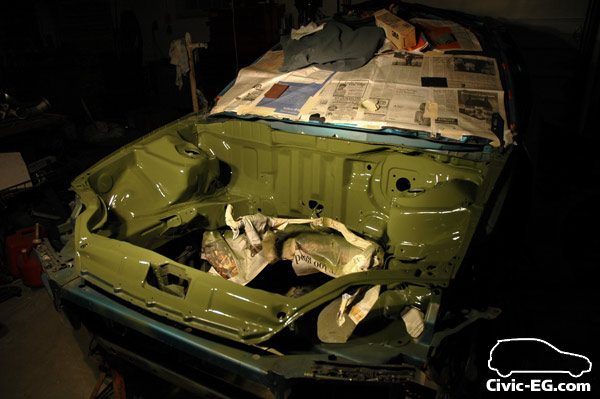
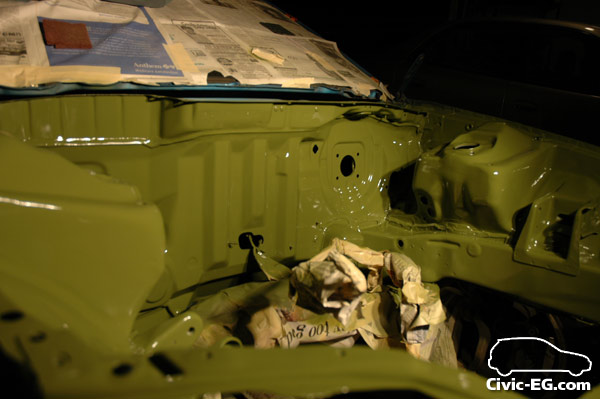
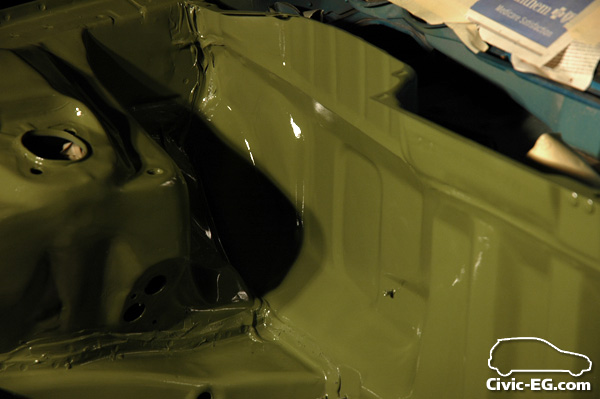

all is left for the bay is the motor + radiator install everything else is relocated or in the junk pile.
| teal_dx |
| (Post Master) |
| 01/09/07 02:12 PM |
|
|
|
|
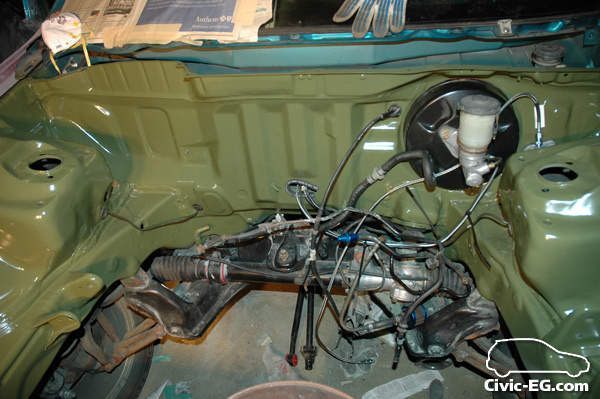
the brake proportioning valve is on the other side of the firewall
The wiring in the engine bay has all been tucked, next is to tuck the engine harness...
first I labeled it all since I'm paranoid I would screw this up somehow...
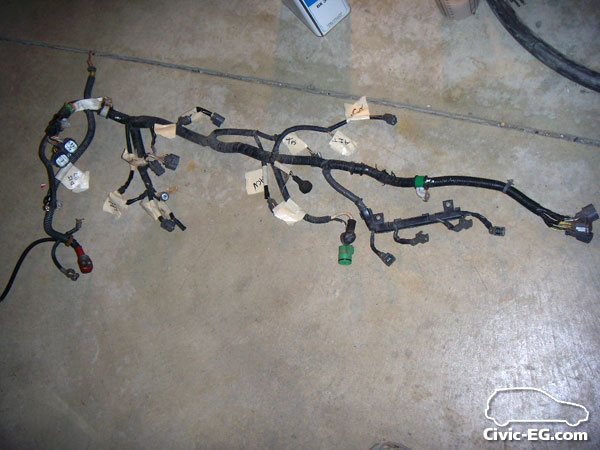
step 2: start ripping stuff apart
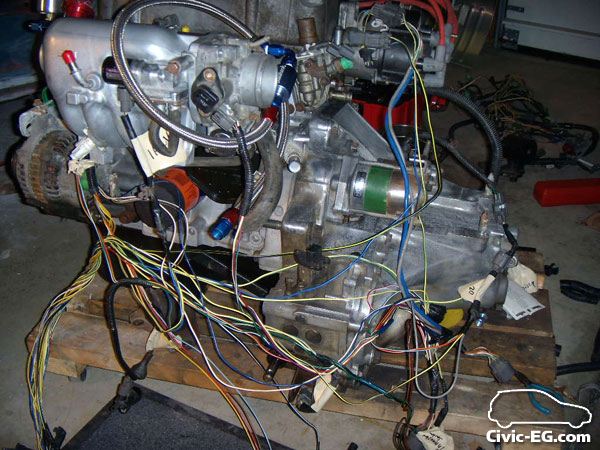
I ruined some poor japanese guy's hard work...
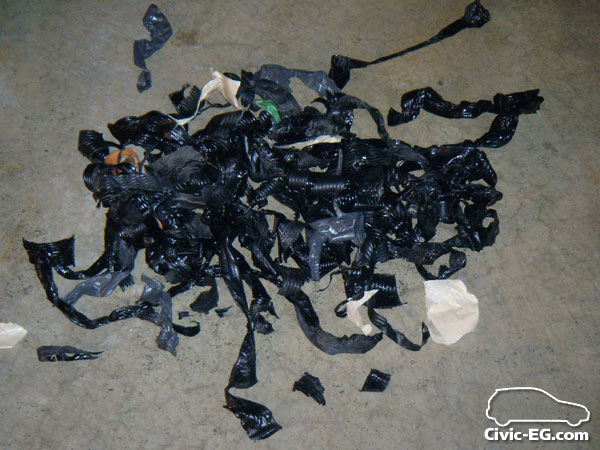
shit made my fingers black + sticky

The stock harness splits into the back corners of the bay, the new one will have all connectors to the main harness meet in the middle and enter thru the enlarged hole where the heater core hoses used to be.
Next I am going to be cutting/soldering. chill... till the next episode
| **DONOTDELETE** |
| () |
| 01/09/07 04:11 PM |
|
|
You fucking rock. I really hope I get to see this car at a meet in the future.
| underESTIMATED |
| (Post Master Sr) |
| 01/09/07 06:40 PM |
|
|
|
|
Originally Posted By: dorikin22
You fucking rock. I really hope I get to see this car at a meet in the future.
Brian doesn't bring his Honda, to any Honda meets.
| **DONOTDELETE** |
| () |
| 01/09/07 06:56 PM |
|
|
Originally Posted By: underESTIMATED
Originally Posted By: dorikin22
You fucking rock. I really hope I get to see this car at a meet in the future.
Brian doesn't bring his Honda, to any Honda meets.
True. I remember him bringing the Mustang out back in '04. I'd still like the see the handy work in person.
| teal_dx |
| (Post Master) |
| 01/09/07 08:42 PM |
|
|
|
|
Yeah, I brought the ford cause I never had a worthy honda. The ford will probably collect some dust when I finish the civic! I don't see why it shouldn't be done before this year's CSi meet (I was hoping to get it done by last year's meet lol)
| **DONOTDELETE** |
| () |
| 01/09/07 09:18 PM |
|
|
YES! Can I be your apprentice?
| SiWheelman |
| (Post Master) |
| 01/09/07 11:57 PM |
|
|
|
|
looking awesome! hopefully I can figure out a way to get mine through e-check so we can do some cruising this summer.
| Stryker124 |
| (Major Member) |
| 01/10/07 07:30 AM |
|
|
Looks incredible man, can't wait to see the whole car painted that color. When you get done I'll have to have you come help me get my Integra back together haha.
| ALCAP2ONE |
| (Post Master Supreme) |
| 01/10/07 02:26 PM |
|
|
|
|
looking good as always
| slackereg6 |
| (Member) |
| 01/14/07 09:07 PM |
|
|
|
Wow man looks nice.
| teal_dx |
| (Post Master) |
| 06/18/07 11:25 AM |
|
|
|
|
it's been a long ass time! The car is done (enough) and I just started putting miles on it. There were a few bumps in the road, but once I got it running right it passed E-check no prob
I left off with the engine harness being made and the bay just painted.
I have 1000+ pics I've taken so I'll try to make this the cliff notes...
the harness all done & wrapped up.
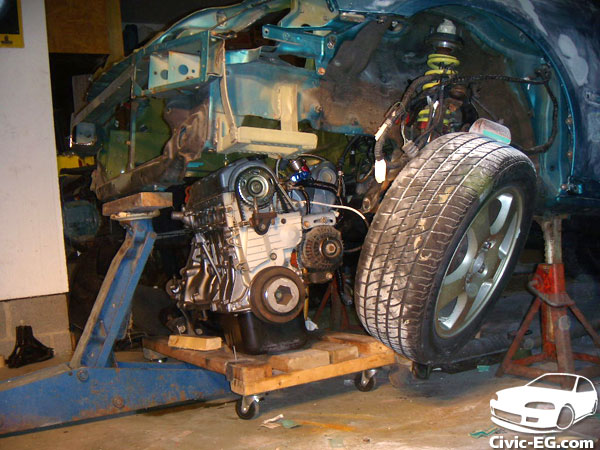
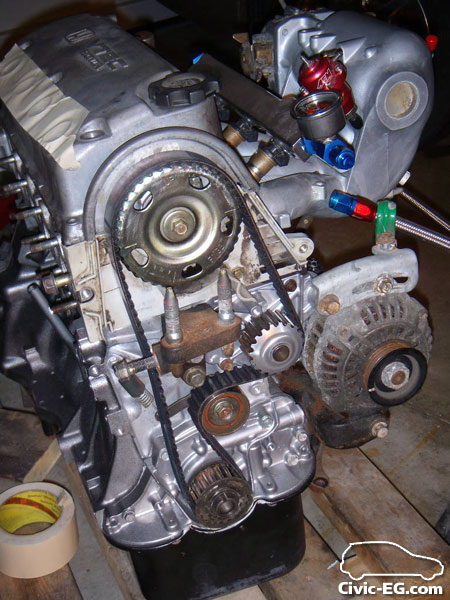
motor back in & bolted up.

stock horn sucks
Interior was a fucking mess, these pics are taken AFTER I organized everything.
(That's your MSD coil Bryce!)
everything done in the bay
exterior:
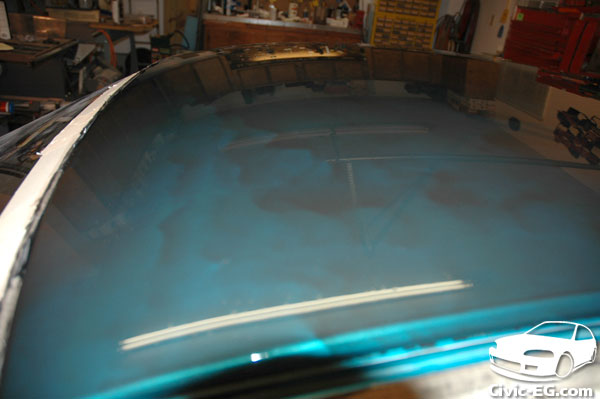
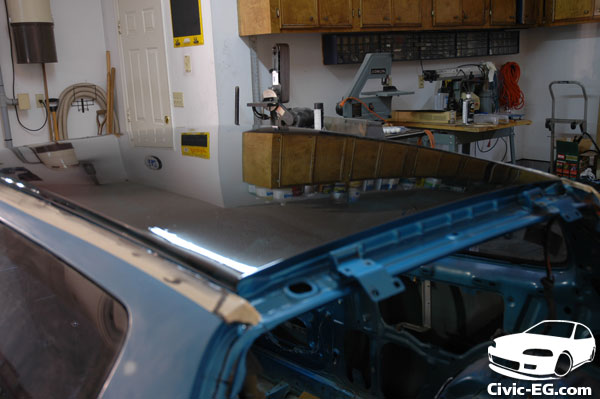
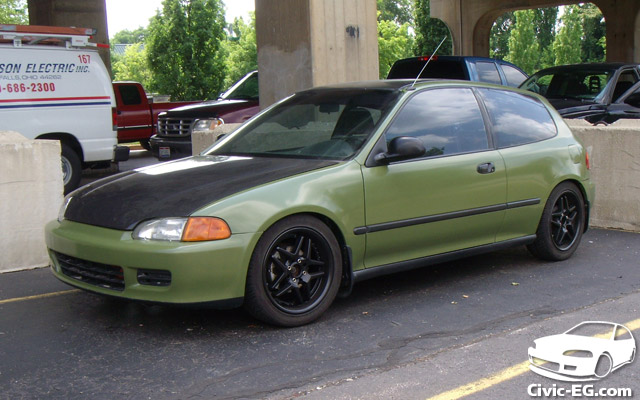
did the $50 roller job on the roof - I am going to go back and do a few more light coats before I buff it. Right now it's a dull black.
some stuff painted
one of many guide coats. I decided that I no longer like body work!
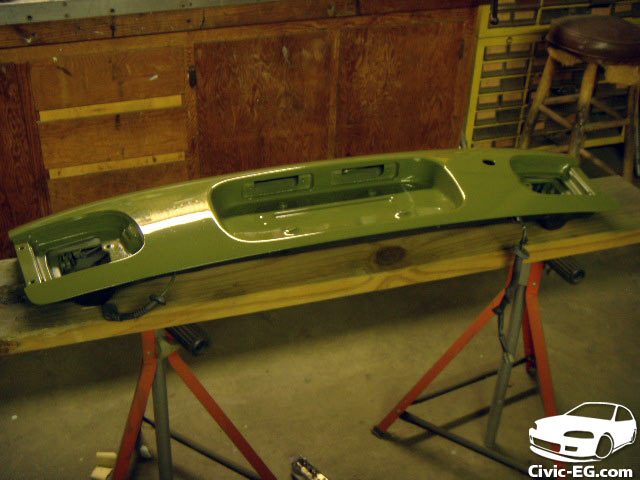
Tail Gate I bought from Vader Si
paint:

I was painting w/ shorts on and wearing shoes...
putting it all together...
painted the old shoes black
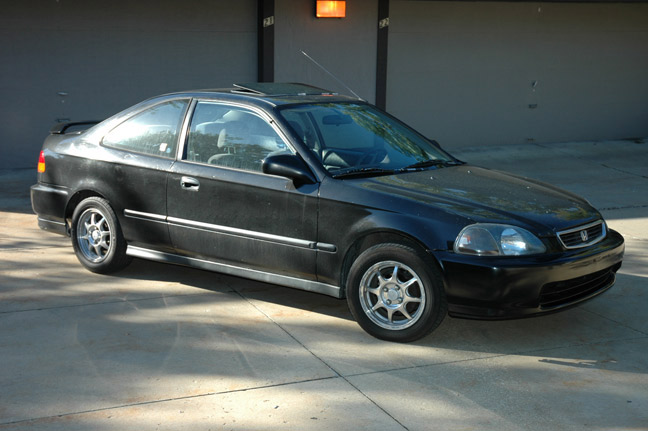
here it is:

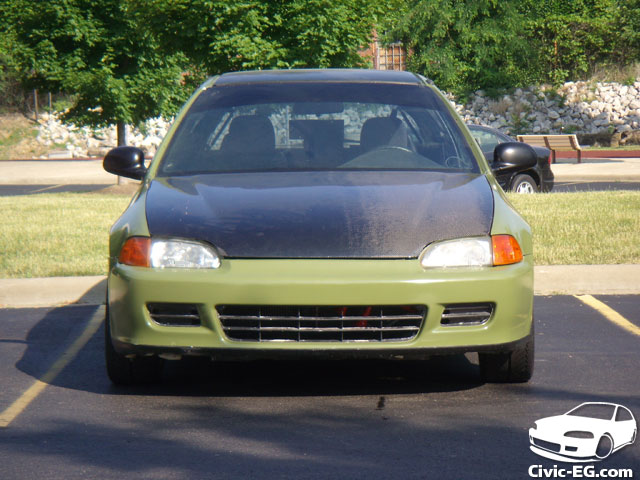
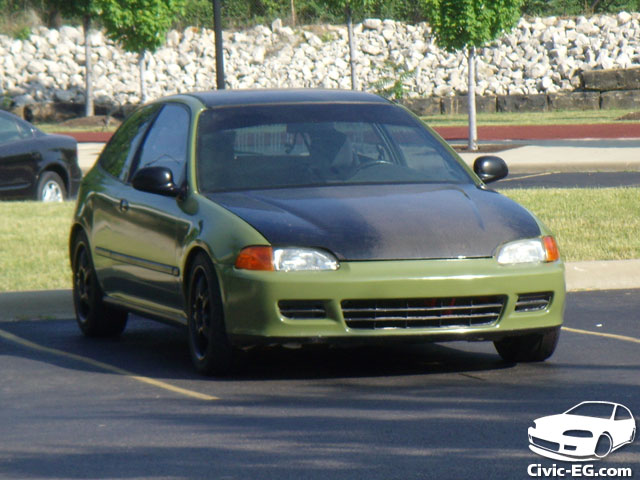
It has about 55 miles on the new motor so far and everything's sounding great.
It was running like shit and I went through the whole replace everything phase untill I was running out of things to replace. It would start fine, then it kept putting black soot all over the plugs and running like shit until it got warm and stalled. If I even blipped the gas it would die too. I tried different plugs, wires, distributor w/o external coil, the FPR was set at 42 psi, tried different grounds, even a bigger battery. The P28 I bought from someone on ohiohondas was an auto, not manual like they said, so I converted that and the CEL 19 was gone. Other than that it was not giving me any CEL's which made it a bitch to diagnose the problem.
The problem ended up being the throttle body! The 92's use a TB with the MAP remotely mounted to the firewall. I had relocated it to the inside, so I moved it back closer to the engine with no results. But when I started the car with the MAP unplugged it ran fine (with a CEL) I ended up using a newer throttle body that had the MAP mounted to the throttle body itself, and didn't have the ugly nut sack coolant thingy on the bottom. That cured it! My only guess is the 93-95 P28's aren't compatible with the 92 throttle body & MAP sensor arrangement. It was still running shitty, after adjusting the idle screw it was better.
Next, the car was getting too hot,
For the first time, the car idled long enough to bring the temp gauge to 2/3 Hot so I shut it off and let it cool.
I boiled the thermostat in a pan and it was good. So I replaced the Thermostat temperature switch (since the car was running crappy when warm, I figured maybe it had something to do with it), and then bled the air from the cooling system.
Started it up, turned the idle screw a litle further out, and it idles and runs perfect!
There was an incident during the initial test drive... The car was hard to push by hand, I figured the rotors were just caked with rust from sitting for 18 months. So I went to drive it around the block and the brakes sounded like a train, so I figured they were just really rusty. Instead, the brake pedal got stif and the brakes were applied constantly. To the point where if I let off the gas, the car would stop! So I turned in a gravel driveway to turn around. Backing out it stalled and I couldn't get it moving again. Brakes were locked up. Finally I had to rev the hell out of the brand new clutch (XTD 6 puck) and after like 10 tries I backed out of the driveway. I had to limp it home in first gear at 15 mph lol. If I shifted into second, there wasn't enough power to pull the car with the brakes clamping so hard. I got home and the pads were smoking and all 4 corners were stuck. I found a way to loosen the brake stop switch to give the pedal an extra 1/4" of movement out and everything was fine after that. Most of the noise ended up being the splash guards rubbing.
There's still a list of things to do...
Wetsand
Paint the interior
gauges
alignment
finish painting roof
replace cracked windshield
put a radio in (silence sucks after a while)
make a plate to put over the hole where the AT shifter cable was.
Then..... I should have 500+ miles = Turbo Time
I owe everybody thanks for following the project from the start.
Especially Bryce (tgbastau) - he just GAVE me a D16z6 w/ Si tranny. It was knocking, but just what I needed to convince me to build a turbo motor. If I didn't get that motor, I'd still be rocking the D15 mini-me forever.
Dave (underESTIMATED) - thanks for your Morocars Discount on all the OEM Honda parts. (Damn, you still worked at Motorcars back then... That's how long this project has taken lol)
Shane (VaderSi) - Thanks for the deal on the tail gate.
That's the cliff notes!
For the full story & write-ups w/ pics, check out http://civic-eg.com (shamless plug
I started the site last year when I was building the car from a bare shell. Everything I did was documented to create a technical site strictly for the 92-95 civic. (9 months later, there are 600 members!)
I'll finally be bringing my civic to CSi meets instead of the Mustang
|
TenTwelve
|
| (Post Master Supreme) |
| 06/18/07 12:39 PM |
|
|
|
|
Looks fantastic. Great work!
| Stryker124 |
| (Major Member) |
| 06/18/07 05:43 PM |
|
|
Yeah it looks incredible! But how come you aren't rockin the polished HX wheels?? I've been waiting for 2 years to see pics of those on your car!
| teal_dx |
| (Post Master) |
| 06/18/07 11:13 PM |
|
|
|
|
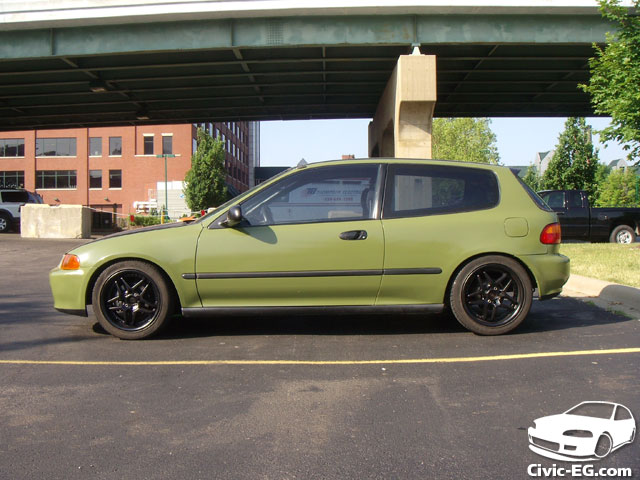
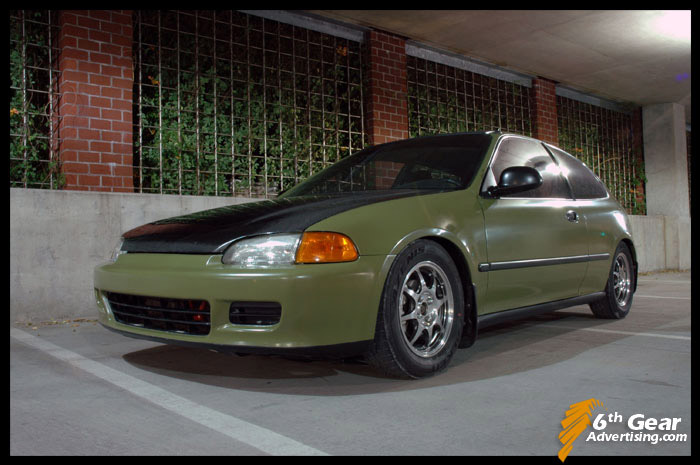
I need to get them balanced and take my car in for an alignment. Then the HX's will be on!
so hopefully within the next week.
| SiWheelman |
| (Post Master) |
| 06/19/07 12:38 AM |
|
|
|
|
looks great! can't wait to see it in person sometime.
| Mad Hungarian? |
| (Post Master Supreme) |
| 06/19/07 09:06 AM |
|
|
|
|
Seriously man that is an impressive full on build up. You should be proud of your work. I don't know how you found that much time to build the ride, but seriously nice job
| ClevelandHellcat |
| (Post Master Sr) |
| 06/29/07 07:57 PM |

|
|
|
Noice
| underESTIMATED |
| (Post Master Sr) |
| 06/29/07 08:54 PM |
|
|
|
|
Originally Posted By: teal_dx
I owe everybody thanks for following the project from the start.
Especially Bryce (tgbastau) - he just GAVE me a D16z6 w/ Si tranny. It was knocking, but just what I needed to convince me to build a turbo motor. If I didn't get that motor, I'd still be rocking the D15 mini-me forever.
Dave (underESTIMATED) - thanks for your Morocars Discount on all the OEM Honda parts. (Damn, you still worked at Motorcars back then... That's how long this project has taken lol)
Shane (VaderSi) - Thanks for the deal on the tail gate.
That's the cliff notes!
For the full story & write-ups w/ pics, check out http://civic-eg.com (shamless plug
I started the site last year when I was building the car from a bare shell. Everything I did was documented to create a technical site strictly for the 92-95 civic. (9 months later, there are 600 members!)
I'll finally be bringing my civic to CSi meets instead of the Mustang
That was definately some time ago. Almost 1 1/2 years ago. Damn!!!
Glad to finally see it in person, like Csaba posted...congratulations on a job well respectable, and done.
| teal_dx |
| (Post Master) |
| 07/02/07 09:36 AM |
|
|
|
|
I lowered it a bit more, and put some OEM mudflaps on. I drove it 200+ miles this weekend, I'm probably going to hit 500 miles this week. Time to start rounding up all the turbo stuff.
The last thing I need to buy is some aluminum IC piping... anyone know where I can find a good deal? Thinking about buying one of the ebay kits...
| tgbastau |
| (Member) |
| 07/03/07 02:41 AM |
|
|
|
|
Congratulations, it's looking great! I haven't posted since last fall, but something (maybe being up at 3:30 on a Monday) possessed me to check the site for some progress, and here it is. Glad you were able to use the old Z6, and can't wait to see it finished - polished hx's and turbo, etc.
-Bryce
| PeteMRsi |
| (Post Master Sr) |
| 07/09/07 09:07 AM |
|
|
excellent job - and you did it all yourself.
Total $/hours?
| teal_dx |
| (Post Master) |
| 07/09/07 03:58 PM |
|
|
|
|
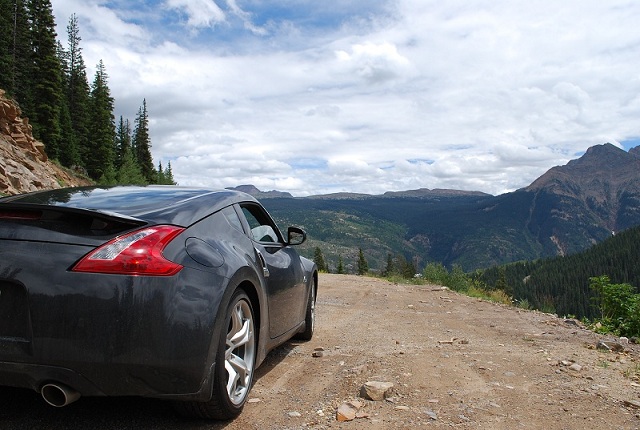
Originally Posted By: PeteMRsi
Total $/hours?
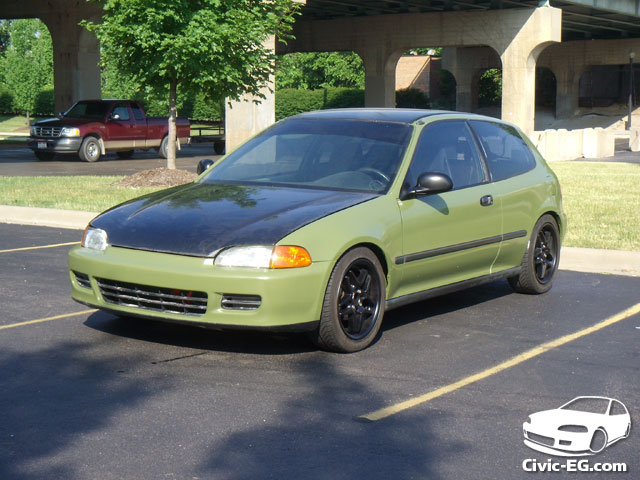
Here's a pic with the HX rims on:
actually, I've got a bunch of pics from a photoshoot the other night w/ underEstimated's s2000. I might as well make a new thread
| Erod |
| (Post Master Sr) |
| 07/20/07 07:05 PM |

|
|
|
ok wow. wow wow, I love it.
2 things.
Care to diagnose/fix my transmission problem?
Care to be on gaugemagazine.com?
| teal_dx |
| (Post Master) |
| 07/26/07 10:08 AM |
|
|
|
|
Originally Posted By: Erod
ok wow. wow wow, I love it.
2 things.
Care to diagnose/fix my transmission problem?
Care to be on gaugemagazine.com?
2 things.
Care to diagnose/fix my transmission problem?
Care to be on gaugemagazine.com?
I'm not a tranny expert in any way, I've never looked inside of one. But I'll give it a try...
The pics do my car justice, it's in no way a show car. But sure I'd be interested! You gotta wait a little while though until I get it wet sanded & have the turbo on.
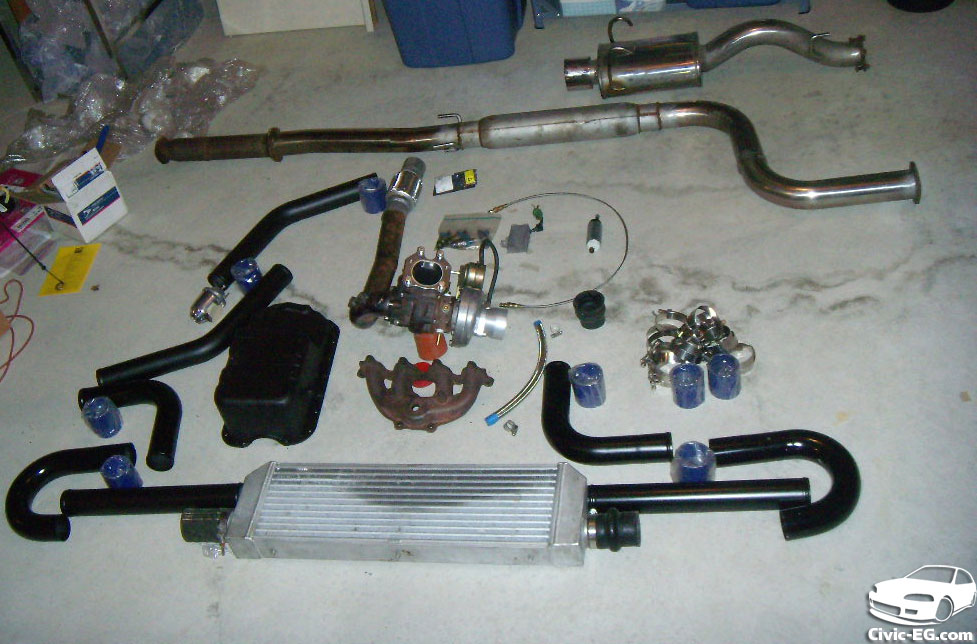
I've gathered everything except for a few small parts...
| Hefay |
| (Poster) |
| 08/05/07 11:36 PM |
|
|
|
|
what else do you need?
| teal_dx |
| (Post Master) |
| 08/06/07 01:21 PM |
|
|
|
|
2.5" flange set, got that since the pic was taken. I have a couple filters, but I'm going to buy a new K&N once I get the piping fitted. I can't remember what else right now, a couple of tiny things...